


35
Using the Main Menu
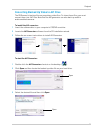
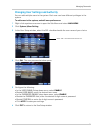
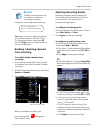
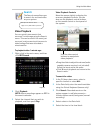
Record
The Record menu allows you
to configure scheduled
recording, recording
resolution, and image quality settings.
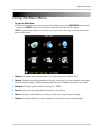
Tip: When you want to apply the set
ting
to multiple channels, click the "Copy
To" drop-down menu, and select All.
Click the Copy button to copy the setting
across all channels.
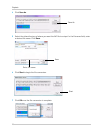
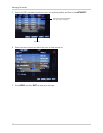
Enabling / disabling channels
from recording
To en able/ disable channels from
recording:
1 In the
Channel drop-down menu, select
the channel you wish to enable / disable
recording.
2 Click Rec
ord drop-down menu, and select
Enable or Disable.
3 Cl
ick Apply to save your settings.
When you disable recording, the
recording symbol ( )disappears
from channel view.
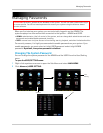
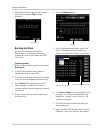
Adjusting Recording Quality
Adjusting recording quality allows you
to customize which cameras will record
in more detail. This allows you to
conserve storage space.
To configure recording quality:
1 Click the
Quality drop-down menu. Select
from Best, Better, or Good.
2 Click Appl
y to save your settings.
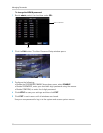
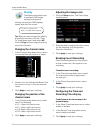
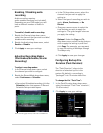
To configure recording frame rates:
1 Click the
Frame Rate drop-down menu,
and select Fixed or Manual.
• If you select Fixed, beside the Resolution
dr
op-down menu, select from D1, HD1 or
CIF.
• Click Apply to save your settings.
OR
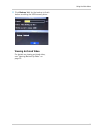
• If you select Manual, click the Frame Rate
button that appears. A Set FPS window will
appear.
a. In the CIF drop-down menu, select the
r
esolution (choose from D1, HD1 or CIF).
b. In the frame-rate drop-down menu,
sel
ect the desired frame rate (choose
from 1 ~ 30 frames).
c. The FPS counter near the top of the
windo
w indicates how many frames you
have left to allocate additional frames to
channels.
d. Click A
pply to save your settings.
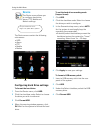
Right-click>Main Menu>Record
To open the Record menu:
Record drop-down menu
C