


56
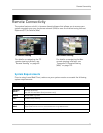
Remote Connectivity
Accessing your DVR Remotely
Setting up remote connectivity allows you to view your DVR from any computer with
internet access, and your mobile device.
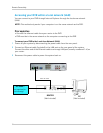
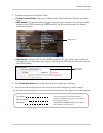
To set up remote connectivity
with your DVR, you must:
1 P
ort Forward ports 80 , 9000, and 1025 on your router.
2 Cr
eate a DDNS account
3 Enabl
e DDNS on the DVR
4 Ent
er the DDNS information into the DVR
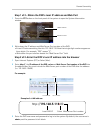
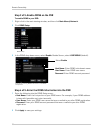
Step 1 of 5: Port Forwarding
You must port forward ports 80, 9000, and 1025 on your router before you can remotely
connect to your system. There are several methods to port forward your router:
• Manually port forward the required ports on your router by following your router
manuf
acturer’s instructions.
• Use the L
orex Auto Port Forwarding Wizard (PC only) to port forward the required ports
(see CD for details). For instructions on how to use the Auto Port Forwarding Wizard, see
“Appendix E: Internet Setup Wizard (PC only)” on page 101.
NOTE: If the
above ports are not forwarded on your router, you will not be able to access
your system remotely.
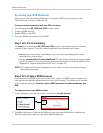
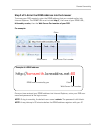
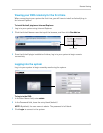
Step 2 of 5: Create a DDNS Account
Lorex offers a free DDNS service for use with your system. A DDNS account allows you to
set up a web site address that points back to your local network. This allows you to connect
to your system remotely. You must create a DDNS account in the same network as your
DVR.
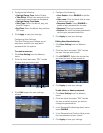
To setup your free Lorex DDNS account:
1 I
n your browser, go to http://lorexddns.net and click Create Account.
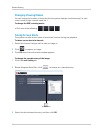
2 Com
plete the Account Information fields with your personal information. Complete the
Warranty Information with your purchase details (optional).