


7
Set the WHITE BAL selector switch to A or B execute AWB.
Next, execute ABB and then execute AWB again.
WHITE BAL: A or B
8
Repeat step 6.
9
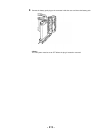
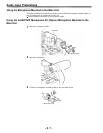
Set the MENU switch from OFF to SET while holding down the SHIFT/ITEM and UP buttons
to open the menu.
Press the PAGE button until the AUTO SHADING page appears.
Press the SHIFT/ITEM button to move the arrow on the left to the WHITE position and then
press the UP or DOWN button.
ACTIVE appears on the viewfinder to indicate that white shading automatic adjustment is
operating.
Adjustment is completed when the ACTIVE display disappears.
Return the MENU switch from SET to OFF to close the menu.
10
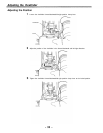
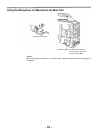
When the lens to be used has an extender, insert an extender and repeat steps 6 to 9.
This completes white shading adjustment.
The adjustment value is stored in the non-volatile memory, so there is no need to readjust the
white shading even if the power for the unit is turned off.
<Notes>
1. The white shading can be adjusted for general lenses using the above method. However, this
method may not apply for extremely special lenses.
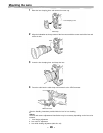
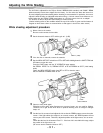
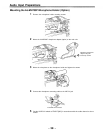
2. When using a 2/3-inch camera lens, be sure to mount the lens using a conversion adaptor.
These lenses cannot be mounted directly as their dimensions differ. Attempting to mount these
lenses directly may damage the unit.
3. Vertical coloring may occur near the open position of the lens iris even after performing the
above adjustments. However, this is characteristic of the optical system of the lens, and does
not indicate a malfunction.
-32-