


Adjusting the Time and Date
Adjustment and setup using the setting menu
1.
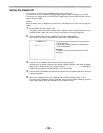
Hold down the SHIFT/ITEM and UP buttons and set the MENU SET/OFF switch to SET. The
unit switches to ENG mode.
The page on which the previous setting menu operations were completed appears on the
viewfinder screen.
(When the menu is used for the first time, the first page appears.)
2.
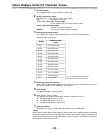
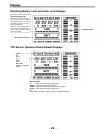
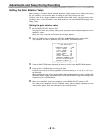
Press the PAGE button until the TIME/DATE page shown below appears.
(This operation can also be performed using the PAGE+UP/DOWN function.)
– TIME/DATE –
YEAR :95
MONTH :01
DAY
: 01
HOUR
:00
MINUTE:00
TIME/DATE SET
3.
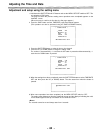
Press the SHIFT/ITEM button to select the item to be changed.
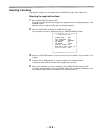
4.
Press the UP (or DOWN) button to change the setting value.
The number is incremented by +1 each time the UP button is pressed and decremented by –1
each time the DOWN button is pressed.
– TIME/DATE –
YEAR : 95
MONTH :01
DAY
: 01
HOUR
:00
MINUTE:00
TIME/DATE SET
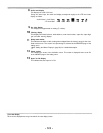
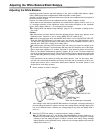
5. When the settings have been completed, press the SHIFT/ITEM button to select TIME/DATE
SET and then press the UP (or DOWN) button. The time starts from when the button is
pressed.
TIME/DATE SET
6. When menu operations have been completed, set the MENU SET/OFF switch to OFF.
The setting menu disappears from the viewfinder screen and the displays indicating the unit’s
current status appear at the top and bottom of the viewfinder screen.
<Note>
The seconds cannot be set and always stat-t from 0 seconds.
-
62
-