


Adjusting the screen
brightness
You can set the screen brightness for each of
the following situations.
! When the detachable device is attached to
the head unit and the vehicle lights are off.
! When the detachable device is attached to
the head unit and the vehicle lights are on.
! When the detachable device is not at-
tached to the head unit.
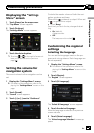
1 Display the “Settings Menu” screen.
= For details of the operations, refer to Dis-
playing the “ Settings Menu” screen on
page 115.
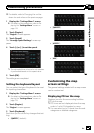
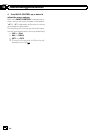
2 Touch [Brightness].
The “Brightness” screen appears.
3 Touch [+] or [–] to adjust the brightness.
Each time you touch [+]or[–] increases or de-
creases the level. “10” to “0” is displayed as
the level is increased or decreased.
4 Touch [OK].
The adjustment is completed.
Recording your travel history
Activating the track logger enables you to re-
cord your driving history (called “track log”
below). You can review the travel history later.
p If an SD memory card is inserted into the
SD card slot, the track logs will be stored in
the SD memory card.
p When the detachable device is removed
from the head unit, this function is not
available.
1 Insert an SD memory card into the SD
card slot.
2 Display the “Settings Menu” screen.
= For details of the operations, refer to Dis-
playing the “ Settings Menu” screen on
page 115.
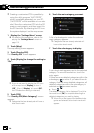
3 Touch [Drive Log].
The “Drive Log” screen appears.
4 Touch [Drive Log].
Each time you touch the key changes that set-
ting.
! On:
You can export your track log to the SD
memory card.
! Off (default):
You cannot export your track log to the SD
memory card.
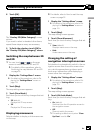
5 Touch [Type].
Each time you touch the key changes that set-
ting.
! Private (default):
Changes the track log attribute to “Private”.
! Business:
Changes the track log attribute to “Busi-
ness”.
! Other:
Changes the track log attribute to “Other”.
p While the setting is “On”, the navigation
system continues to storethe track logs in
the inserted SD memory card.
Using the demonstration
guidance
This is a demonstration function for retail
stores. After a route is set, touching this key
starts the simulation of route guidance.
1 Display the “Settings Menu” screen.
= For details of the operations, refer to Dis-
playing the “ Settings Menu” screen on
page 115.
En
123
Chapter
26
Customizing preferences
Customizing preferences