


61
Advanced Recording Operations Enregistrement – Opérations avancées
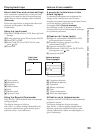
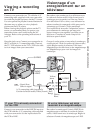
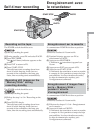
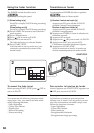
Self-timer recording
START/STOP
START/STOP
PHOTO
PHOTO
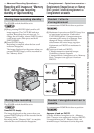
Recording on the tape
The POWER switch should be set to
.
Operate by touching the panel.
(1)During standby, press FN and select PAGE2.
(2)Press SELFTIMER.
The (self-timer) indicator appears on the
screen.
(3)Press EXIT to return to FN.
(4)Press START/STOP.
The self-timer starts counting down from
about 10 while beeping. In the last two
seconds of the countdown, the beep gets
faster, then recording starts automatically.
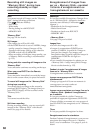
Recording still images on the
“Memory Stick” during
recording standby
The POWER switch should be set to
.
Operate by touching the panel.
(1)Follow the step 1 to 3 in “Recording on the
tape.”
(2)Press PHOTO deeply.
The self-timer starts counting down from
about 10 while beeping. In the last two
seconds of the countdown, the beep gets
faster, then the recording starts automatically.
Enregistrement avec
le retardateur
Enregistrement sur la cassette
Le commutateur POWER doit être en position
.
Utilisez les touches de l’écran tactile.
(1)Pendant l’attente, appuyez sur FN et
sélectionnez la PAGE2.
(2)Appuyez sur SELFTIMER.
L’indicateur (retardateur) apparaît sur
l’écran.
(3)Appuyez sur EXIT pour revenir à FN.
(4)Appuyez sur START/STOP.
La minuterie du retardateur se met en marche
à compter de 10 et pendant ce temps des bips
sont audibles. Les deux dernières secondes,
les bips deviennent plus rapides, puis
l’enregistrement commence.
Enregistrement d’images fixes
sur le « Memory Stick »
pendant l’attente
d’enregistrement
Le commutateur POWER doit être en position
.
Utilisez les touches de l’écran tactile.
(1)Effectuez les étapes 1 à 3 de « Enregistrement
sur la cassette
»
.
(2)Appuyez à fond sur PHOTO.
La minuterie du retardateur se met en marche
à compter de 10 et pendant ce temps des bips
sont audibles. Les deux dernières secondes,
les bips deviennent plus rapides, puis
l’enregistrement commence.