33
Basic Settings Used in All Operation Modes
Chapter 3 Setup
Setting the Time
This procedure sets the time for the internal clock.
1
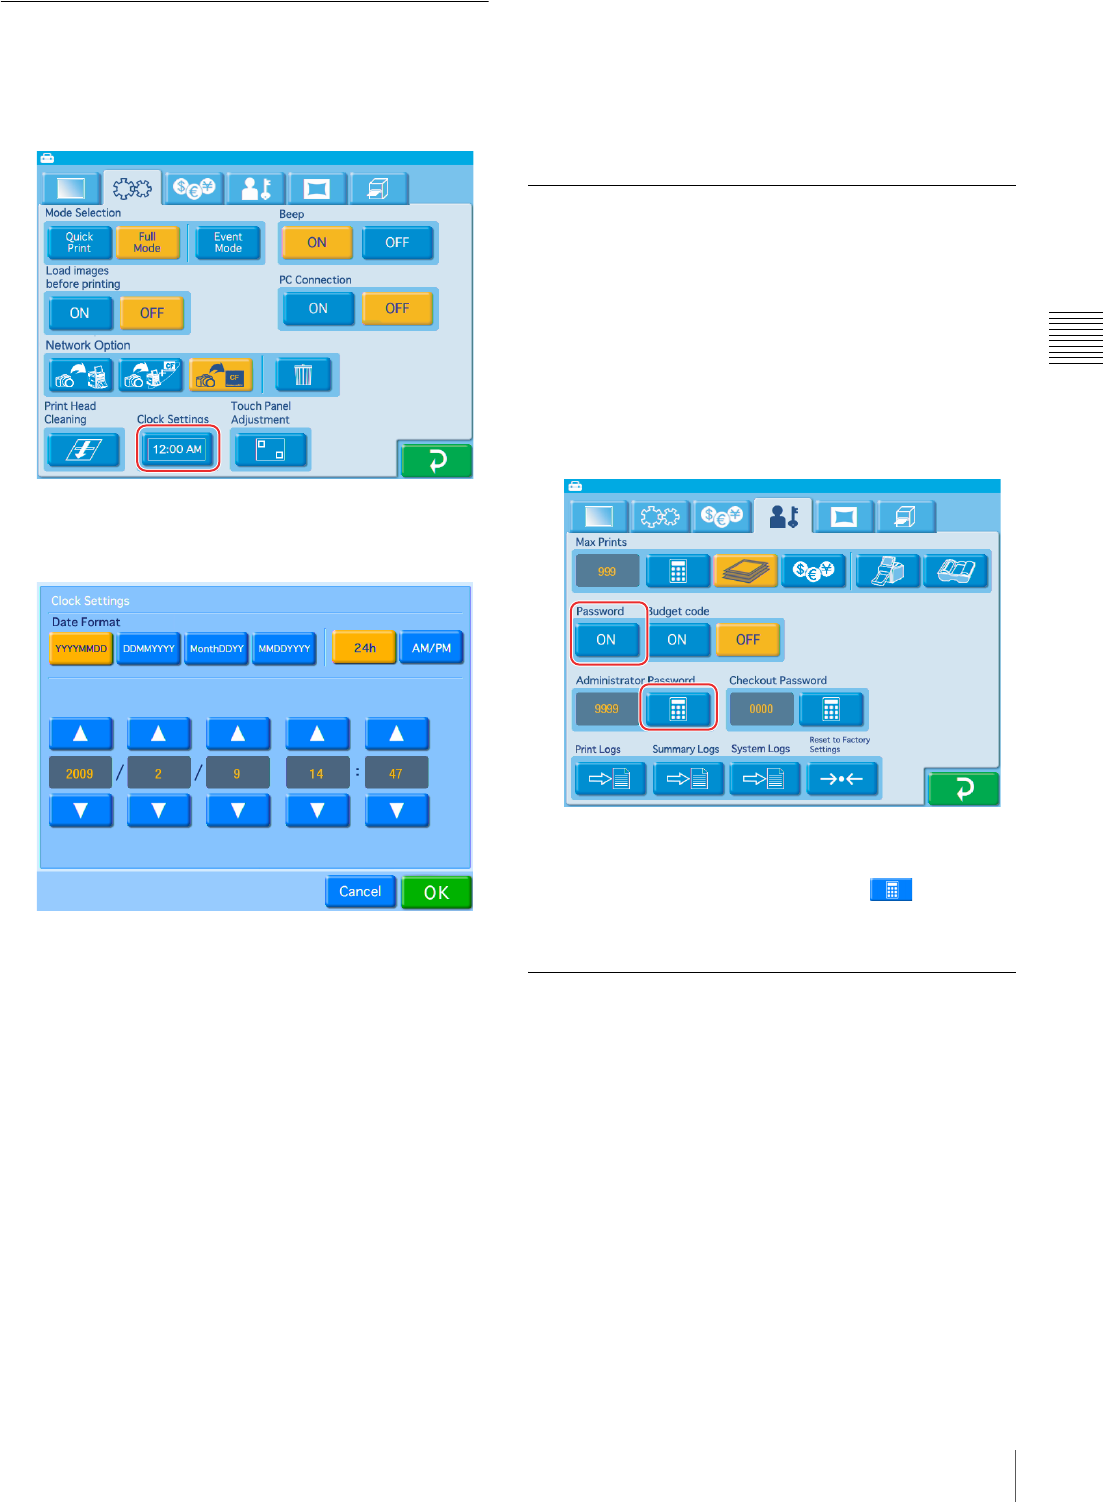
Open the System tab on the administration screen.
2
Touch the [Clock Settings] button.
The following screen appears.
Date format
Select the display format for the date and time from
among the following options.
Date
• YYYY/MM/DD (Ex.: 2009/9/1)
• DD/MM/YYYY (Ex.: 1/9/2009)
• Month/DD/YY (Ex.: Sep/1/09)
• MM/DD/YYYY (Ex.: 9/1/2009)
Time
• 24h (24-hour display)
•AM/PM (AM/PM display)
Use the [v] [V] buttons to set the date and time.
3
Once all settings are complete, touch the [OK] button.
If the date is set to 2008 or earlier, a clock settings
screen allowing you to set the correct date will appear
after you exit the administration screen.
If you cancel and exit the clock settings screen without
setting the date, you will return to the Start Guide
screen.
Setting the Administrator Password
You can change the password required to display the
administration screen.
You can also set the administrator password as the
password entered before printing.
The factory default setting for the administrator password
is “9999.”
1
Open the Administration tab on the administration
screen.
2
Touch the [ON] button under [Password].
3
Touch the [Administrator Password] button, and
enter a four-digit password.
Selecting the Operation Mode
Select the operation mode suited to the intended
application.
1
Open the System tab on the administration screen.
2
Under [Mode Selection], touch the desired operation
mode.
The settings that need to be made depend on the
operation mode that is selected.
For details on the settings for Full mode and Quick
Print mode, see “Settings in Full Mode and Quick
Print Mode” on page 34.
