


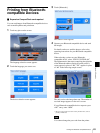

68
Selecting the Print Finish
Chapter 6 Operation
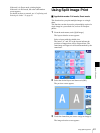
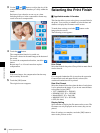
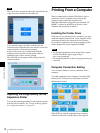
3
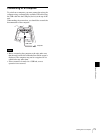
Use the and buttons to adjust the size of the
compensation frame, so that the eye is fully within the
frame.
Perform red eye reduction on one eye at a time.
Including both eyes in the compensation frame may
result in incorrect compensation.
4
Touch the button.
The compensation function is carried out.
The result is shown in the small image at the bottom of
the screen.
To cancel the compensation function, touch the
button.
Repeat steps 2 to 4 for each area that requires
compensation.
With some images, the compensation function may
not be entirely successful.
5
Touch the [OK] button.
The original screen reappears.
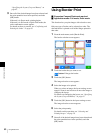
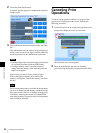
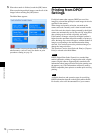
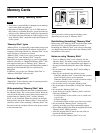
Selecting the Print Finish
J Applicable modes: All modes
This function allows you to select glossy or matte finish for
the prints. You can also set whether to print the date and
whether to display the file names on the screen.
To make these settings, touch the button on the
image selection screen.
The following screen appears.
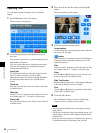
Print Finish
Select the finish for the prints. Glossy finish or matte finish
can be selected.
If a watermark lamination file is stored on the expansion
CompactFlash card and matte finish is selected, the
watermark lamination will be printed.
Date Print Format
Select the format for the date when the date of each photo
is to be printed on the image. If you do not want the dates
to be printed, select [OFF].
• YYYY/MM/DD (Ex.: 2008/9/1)
• DD/MM/YYYY (Ex.: 1/9/2008)
• Month/DD/YY (Ex.: Sep/1/08)
• MM/DD/YYYY (Ex.: 9/1/2008)
• OFF (No dates)
Display Setting
Select whether to display the file names on the screen. The
file names are only displayed on the screen; they are not
printed.
Once all settings are complete, touch the [OK] button to
return to the previous screen.
Note
Note