40
Setting Cut Mode
Chapter 4 Advanced Settings
Setting Cut Mode
It is possible to print in non-standard sizes when using the
2UPC-R205 series, 2UPC-C26 series, or 2UPC-R206
series printing pack. This function allows you to print
several different print sizes without having to replace the
printing pack.
If Cut mode is set, a print size selection screen appears at
the start of the ordering process.
The following print sizes can be set in Cut mode.
2UPC-R205 Series
• 5 × 7 (standard print size)
• 3.5 × 5 (standard print size, cut in half)
2UPC-C26 and 2UPC-R206 Series
• 6 × 8 (standard print size)
• 5 × 7 (image is printed in 5 × 7 on 6 × 8 paper, leaving a
blank border)
• 4 × 6 (standard print size, cut in half)
When printing an image that is half the size of a standard
print (3.5 × 5" for the 2UPC-R205 series and 4 × 6" for
2UPC-C26/2UPC-R206 series), the amount of paper and
ink used is that same as the amount used when printing the
standard sized print. As a result, when you print orders that
result in images filling only part of a sheet, the paper and
ink for that sheet are partially wasted.
When [Odd/Even Message] is set to [ON] and a print order
results in images that fill only part of a sheet, a message
prompting customers to order additional images appears.
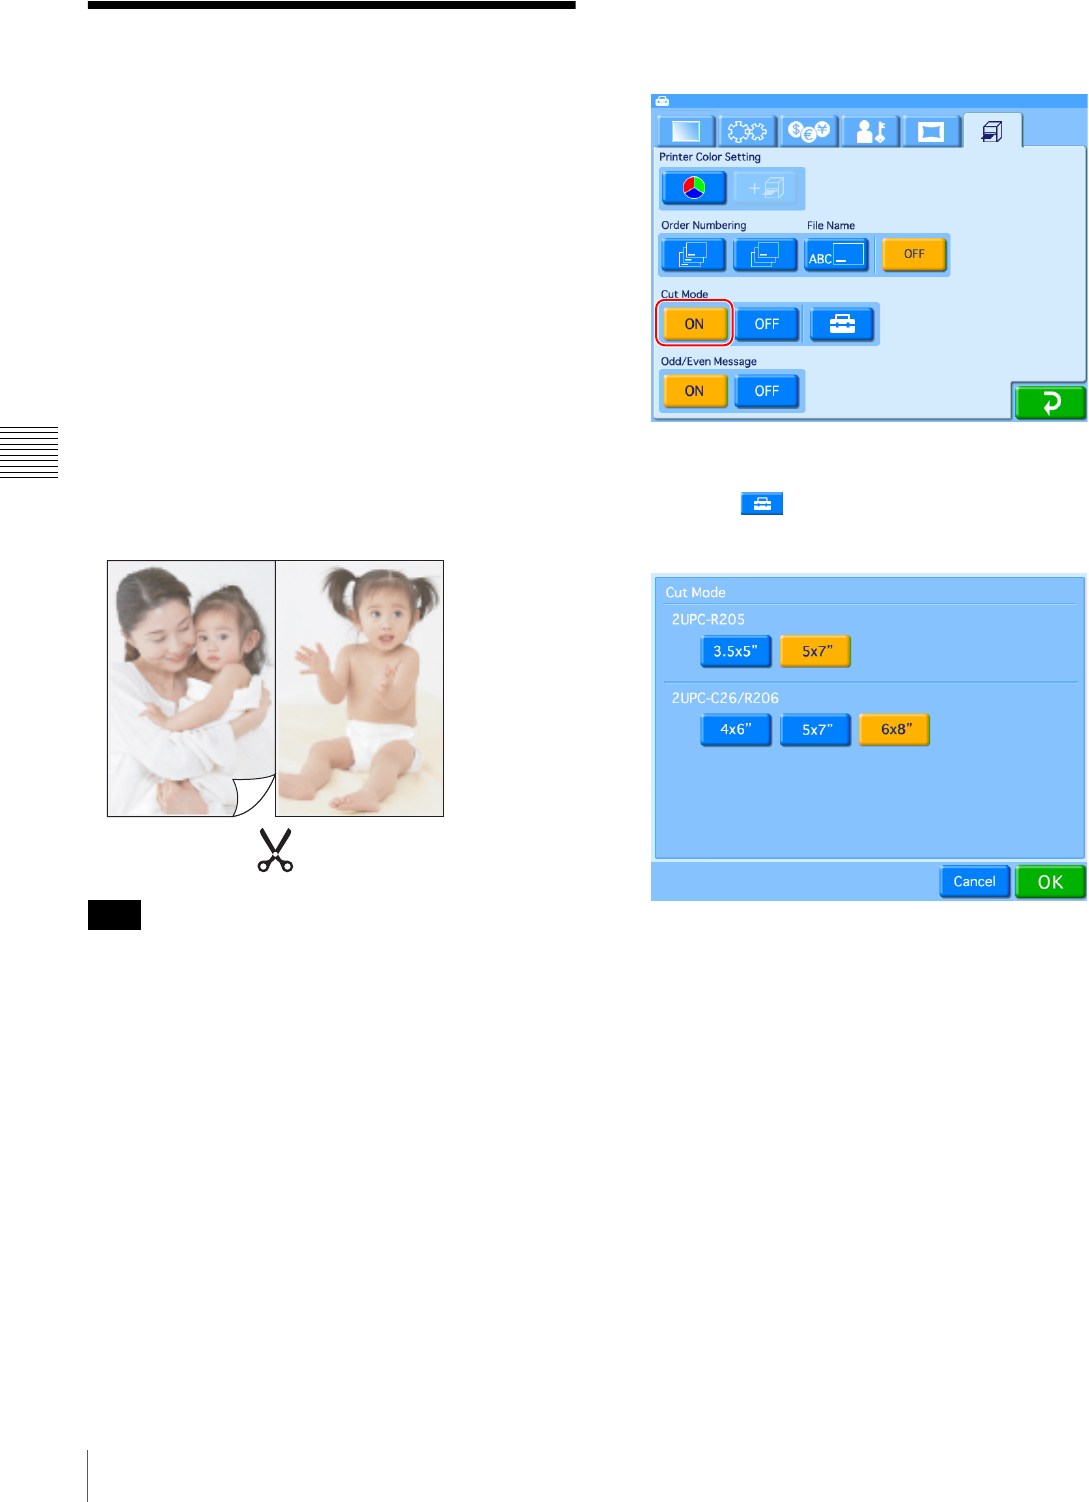
Setting Cut mode
1
Open the Print tab on the administration screen.
2
Touch the [ON] button for [Cut Mode].
3
Touch the button.
The following screen appears.
4
Select the size to be printed.
You can select multiple sizes.
5
Touch the [OK] button.
The display returns to the Print tab.
6
Select [ON] for [Odd/Even Message] if necessary.
When [Odd/Even Message] is set to [ON] and a print
order in Cut mode results in images that fill only part
of a sheet, a message appears.
The [Odd/Even Message] setting is disabled when a
menu other than [Select & Print] is selected in the main
menu.
Note


