54
Displaying Logs
Chapter 5 Maintenance
2
Touch the button.
Two patches, A and B, are printed. The gray pattern
from No. 0 to No. 88 is printed in each.
In the case of the 2UPC-R203 series and 2UPC-R204
series, patch A and patch B are printed separately on
two sheets.
In the case of the 2UPC-R205 series, 2UPC-C26
series, and 2UPC-R206 series, patch A and patch B are
printed on one sheet.
Based on the printed results, decide which patterns,
from among each series of No. 0 to No. 88, provide the
optimal gray balance.
3
Enter the number of the desired pattern from print A in
[A] next to [Gray A - B Print].
To input the number, touch the button.
4
Similarly, enter the number of the desired pattern from
print B in [B] next to [Gray A - B Print].
5
Touch the [OK] button.
Setting the Image Quality for an
Expansion Printer
1
Open the Print tab of the administration screen and
touch the button.
The image quality adjustment screen appears.
2
Using this screen, adjust the image quality in the same
manner as for this unit.
For details on adjusting the gray balance on expansion
printers, refer to the operating instructions for your
expansion printer and please visit the UP-CR20L support
page at http://www.sony.net/snaplab.
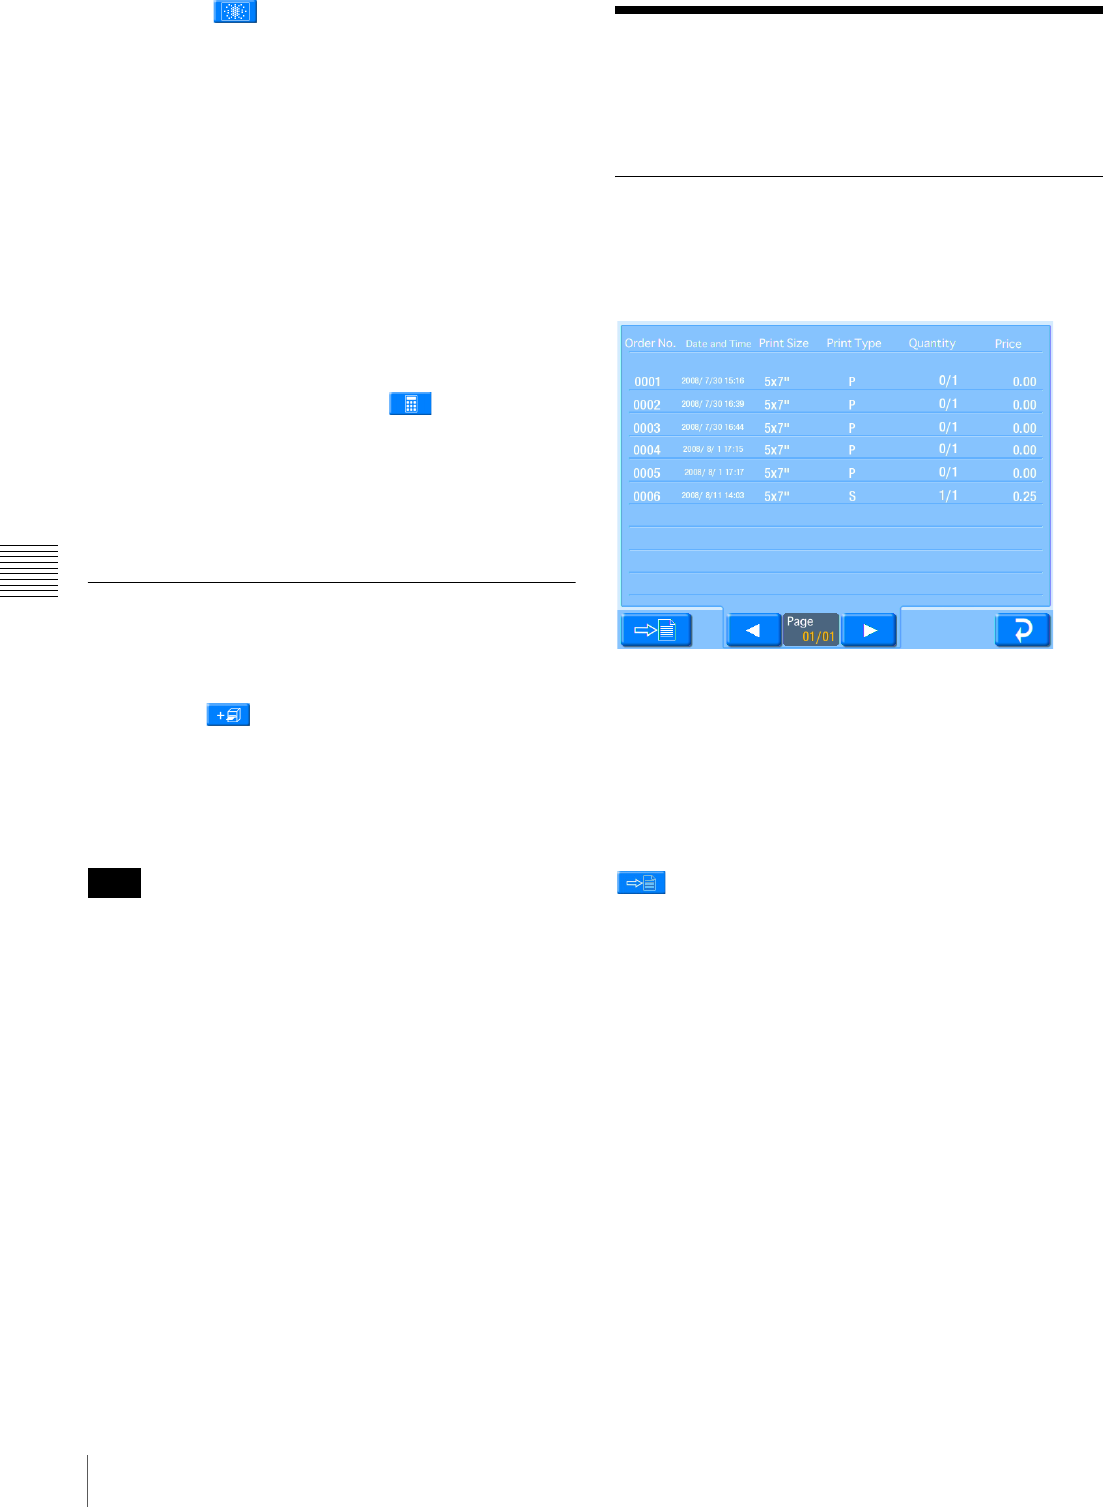
Displaying Logs
The print log and system log can be displayed.
Displaying the Print Log
The print log can be displayed by opening the
Administration tab on the administration screen and then
touching the [Print Logs] button.
The following information is displayed for each order.
•Order No.
•Date
•Print size
• Print type (P: Select & Print, I: Index Print, S: Split
Image, B: Border Print, A: Express Print)
• Number of prints
•Price
button
Touch this button to export the print log to an expansion
CompactFlash card in CSV file format. If budget codes are
being used, the budget code data is included in the
exported CSV file.
Note


