Operations (Shooting and Printing)
23
4
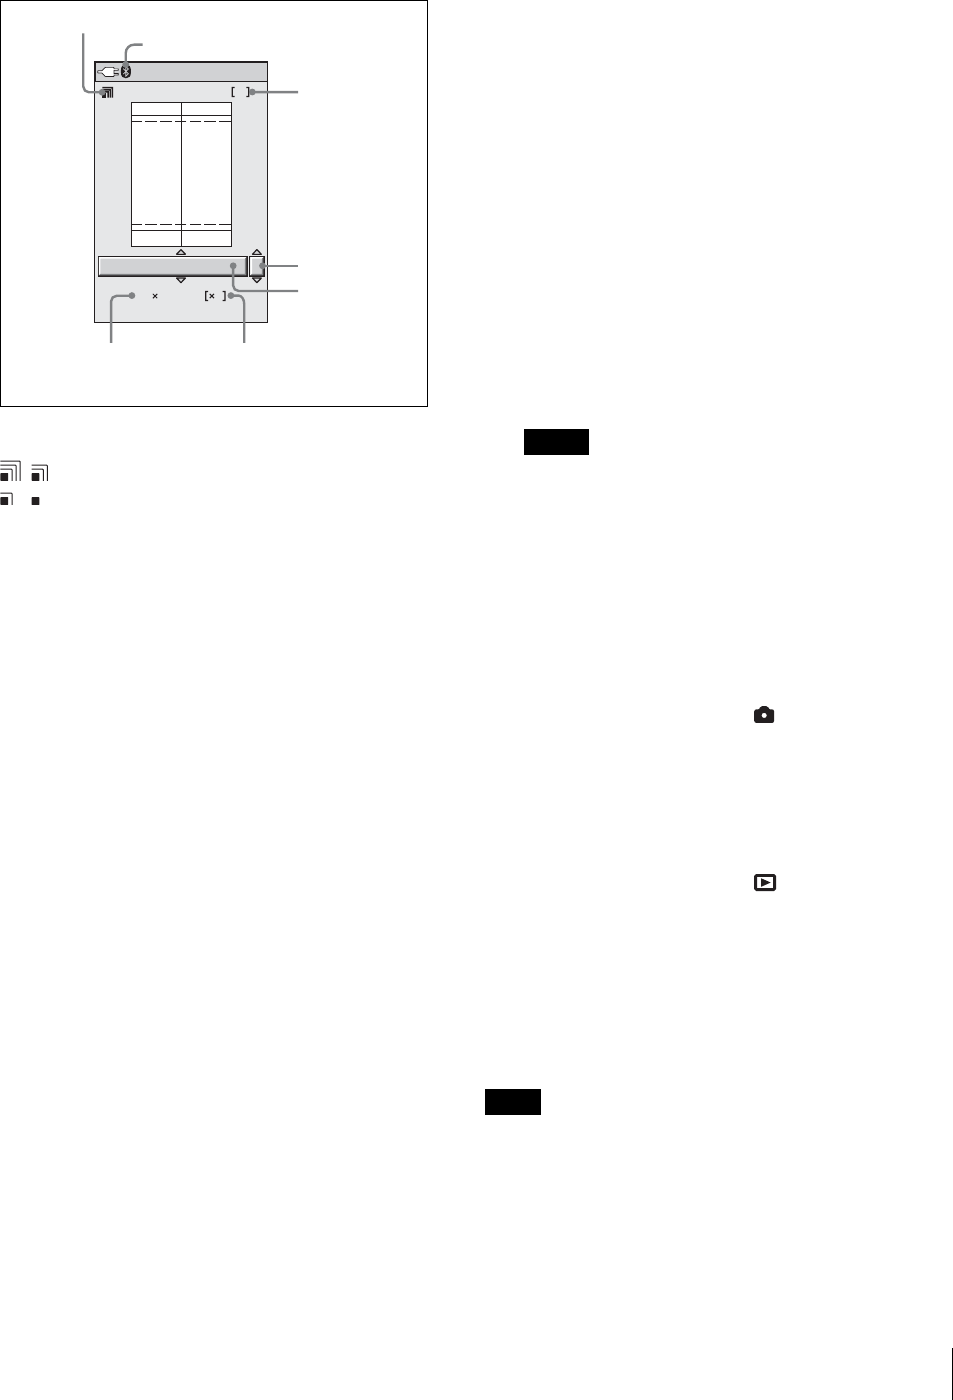
Press the PRINT button.
The print preview screen appears.
You can return to the auto-review screen (or
playback screen) by pressing the MENU button.
You can use the reception indicator on the top left
part of the screen to check the reception state.
: The reception is good.
: The reception is weak and therefore it may
take more time to send images.
Do not move the camera and printer until data
transmission is finished.
5
Press the v or V control button to select a ID photo
frame.
Press the v or V button repeatedly until the desired
ID photo frame appears.
For details, see “Setting up a Frame for Display
During Printing” on page 37.
6
Specify the number of copies to print.
1) Press the B control button once.
Now you can select the number of copies to
print.
2) Press the v or V control button to select the
number of copies to print.
7
Press the COLOR/B&W button to select whether to
print in color or black & white.
8
If necessary, adjust the size of the image to match
the selected ID photo frame.
1) Press the ENTER button.
The ADJUST screen appears.
2) Press the AUTO FRAME button.
The image is automatically adjusted so that the
face size of the subject fits the frame on the
screen.
3) If necessary, use the following buttons to adjust
the size of the image.
– You can press the zoom lever to magnify or
reduce the image.
– You can press the control buttons (vVbB) to
move the displayed part of the image.
4) Press the ENTER button to return to the print
preview screen.
9
Press the PRINT button again.
Picture data are transmitted to the printer, and
“TRANSMITTING” and the progress bar appear
on the LCD.
While the CANCEL button is lit in orange, you can
cancel data transmission by pressing the ENTER
button.
When data transmission ends, the CANCEL button
changes to gray. The printer checks the print pack
then starts printing.
Notes
• Once the CANCEL button changes to gray, you
cannot cancel the print operation.
• Do not touch any button on the camera while the
CANCEL button is gray.
Once printing begins, “TRANSMISSION END. PUSH
MENU KEY TO CONTINUE.” appears on the LCD of
the camera. Press the MENU button to remove the
message.
When the mode switch is set to , the LCD returns to
the auto-review display. Once printing ends, you can
print the same picture again at a different size, color, etc.
You can also take another picture during printing. To
take the next picture, press the release button halfway or
press the zoom lever to turn off the auto-review display.
When the mode switch is set to , the LCD returns to
the playback image.
When a picture is printed, it is ejected onto the paper tray
on the printer.
An image number is printed at the bottom of the printed
image. This is the same number that appeared at the top
of the LCD during image playback.
Note
Do not allow printed sheets to accumulate on the paper
tray. Be sure to remove sheets ejected onto the paper tray
every five sheets.
Bluetooth
1. Sony UP-DX100
1
EU : Passport 3
45 35mm
8
Reception indicator
Number of prints
ID Photo Frame
Number of framesFrame size
Printer name
Bluetooth indicator
1)
1) Appears when the Bluetooth module is set to ON.
