


Adjusting the Print Quality
45
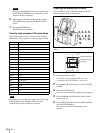
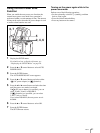
DARK: Pressing B increases the darkness in the
dark parts.
LIGHT: Pressing B increases the brightness in the
bright parts.
GAMMA: Pressing b makes the color tone of the
whole picture lighter, while pressing B makes
it deeper.
SHARPNESS: Pressing B makes the edges of
objects in the picture sharper.
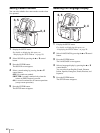
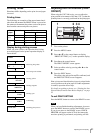
5
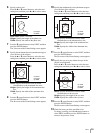
Press the v or V control button to select OK, and
then press the ENTER button.
The Guide Print screen appears.
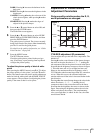
6
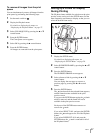
Press the v or V control button to select GUIDE
PRINT-RGB or GUIDE PRINT-DLGm, and then
press the ENTER button.
The guide picture is printed. The picture currently
being played back or the picture taken immediately
previous is used for the guide picture.
For details on the guide print function, see “Guide
Print Function” on page 48.
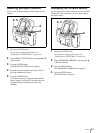
7
Press the MENU button.
The SETUP menu returns.
Check the guide picture printed in the previous
step. If necessary, repeat starting from step 2 and
re-adjust the picture quality.
To adjust the picture quality of black & white
prints
After pressing the MENU button in step 2 of “To adjust
the picture quality of color prints,” press the V control
button. The camera enters the picture quality adjustment
mode for black & white prints and the B&W ADJUST
screen appears. The procedure for adjusting the picture
quality is the same as that for color prints.
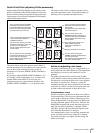
Explanation of Picture Quality
Adjustment Parameters
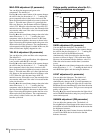
Picture quality variations when the R, G,
and B parameters are changed
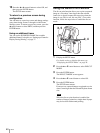
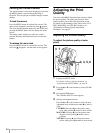
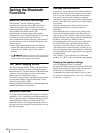
CYN-RED adjustment (R parameter)
You can adjust the cyan and red color components. The
default is 0.
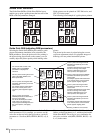
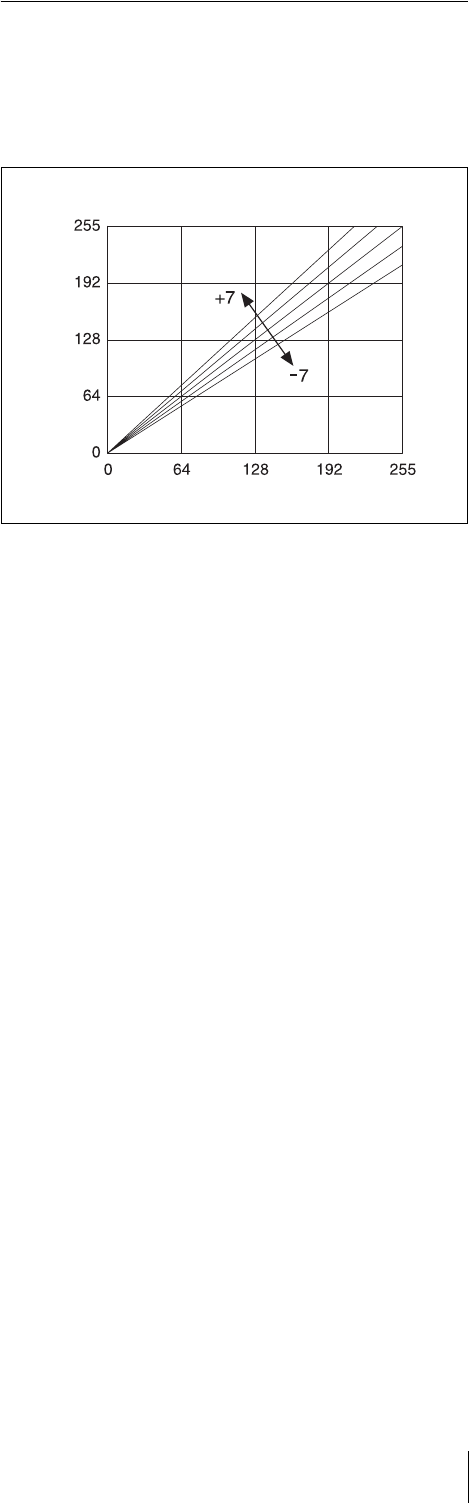
Pressing B on the control button of the camera changes
the value in the plus direction to 1, 2 … 7, making the
red component value in the picture increase in the linear
direction that the brightness increases as shown in figure
1. This adds more red as if a red light has been cast.
However, the maximum effective brightness value is
255. When the value becomes larger than 255, saturation
occurs. When this occurs, the saturated white area
remains white even if the value is increased further in the
plus direction.
Pressing b on the control button changes the value in the
minus direction to –1, –2 … –7, making the red
component value in the picture decrease in the linear
direction that the brightness decreases as shown in the
figure. Decreasing the brightness makes the red color
darker and reduces the redness. The complementary
color cyan (light blue) is added. In this case, the white
area becomes bluish.
Light
Variation
Level
Dark LightSubject
Figure 1