Using the Werks Application LukWerks User Guide
18
Live View
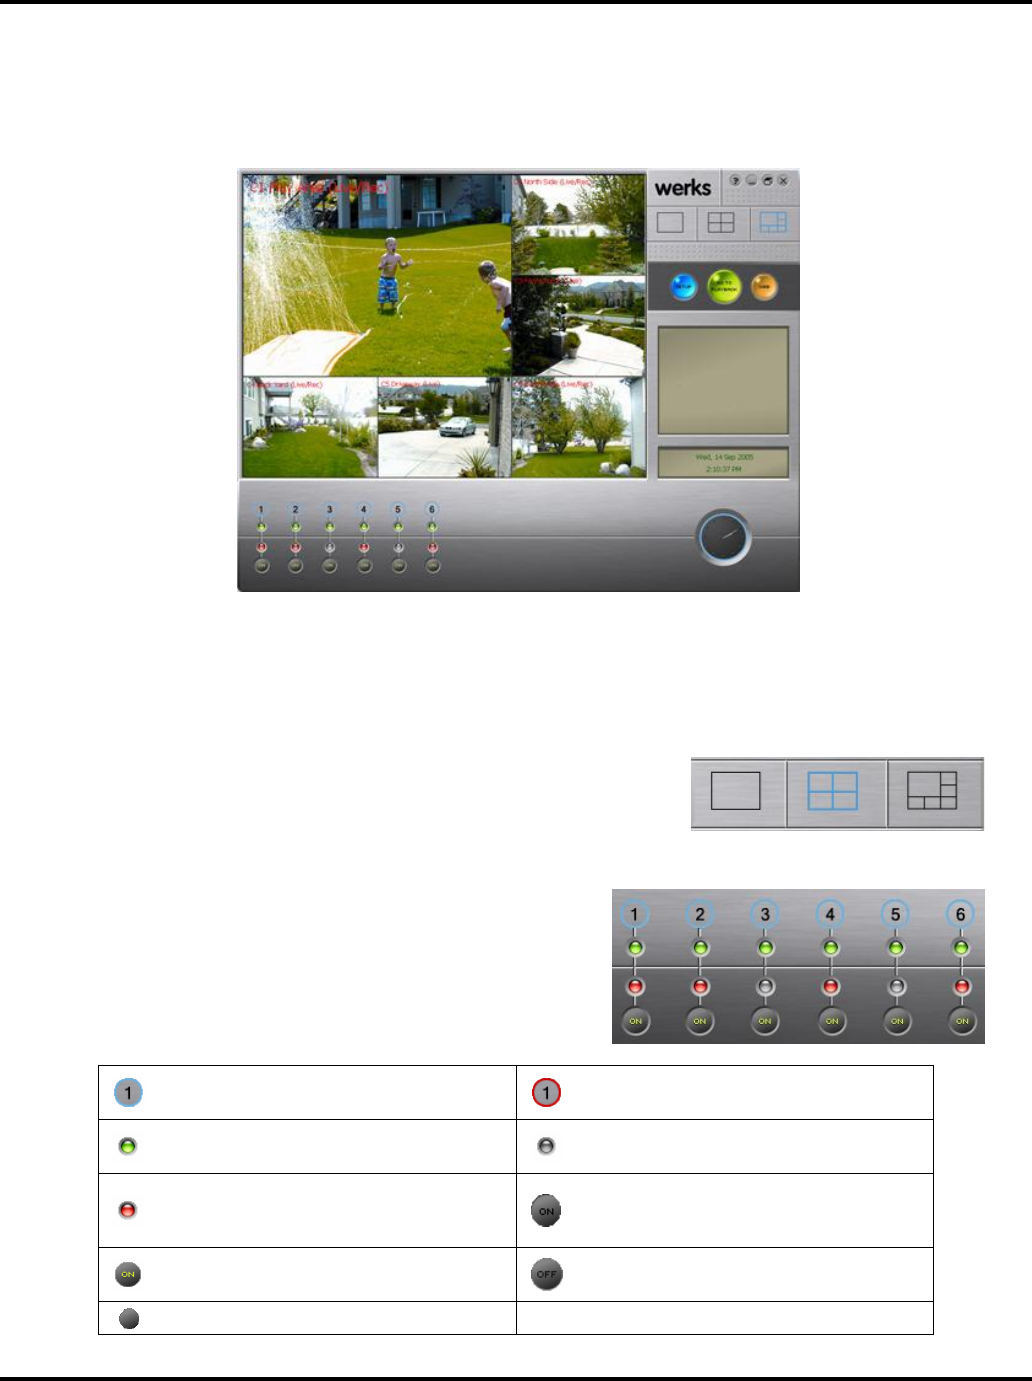
The Live View is the first screen that appears when you open Werks. From here, you can monitor live video
feeds, change screen layouts, and enable and disable cameras and email alerts. This is a screen shot of the
Live View, showing the components of the screen.
Inspect the Video Windows
Werks can display between 1 and 6 video windows depending on your choice of Viewing Modes. Each video
window in the Live View displays live feeds from your cameras. The text in each video window shows the
camera order (C1-C6), camera name, and camera status. If the camera is recording, the status message reads
(Live/Rec) in place of just (Live).
Choose a Multiple-Camera View
Werks allows you to select between 3 viewing modes: single-camera,
quad-camera, and six-camera. Video feeds are tiled and sized to fit in the available display area. Quickly
switch between multi- and single-camera views by clicking on the video window.
Use the Camera Activity Panel
The Camera Activity Panel allows you to monitor all your
cameras at a glance. It shows you which cameras are
connected, set for email alerts, and recording. From this panel
you can also quickly turn cameras on/off and enable/disable
email alerts.
Blue circle shows email alerts are disabled;
click to enable.
Red circle shows email alerts are enabled;
click to disable.
Green light shows camera is streaming
video
Gray (no light) Camera is not streaming
video. No recording is taking place.
Red light shows Camera is recording.
ON (Black) Camera has been detected for
this camera number in the past but is not
detected now.
ON (Yellow) Camera is ON; click to turn OFF.
Camera has been disabled in Live view.
Click to turn ON.
(BLANK) No camera exists for this number.
