


DEFINITY Enterprise Communication Server Release 9
Getting Started with the Avaya R300 Remote Office Communicator
Issue 1
November 2000
Avaya R300 Installation and Upgrade
36Installing the Avaya R300
3
Mount Avaya R300
Refer to the MAX 3000 Installation and Basic Configuration Guide, Chapter 2: “Setting
Up and Testing the MAX Hardware,” for information on mounting the Avaya R300 in a
19" rack.
!
CAUTION:
Do not plug in the Avaya R300’s power cord until all other connections have
been made.
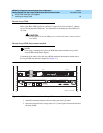
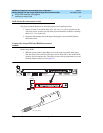
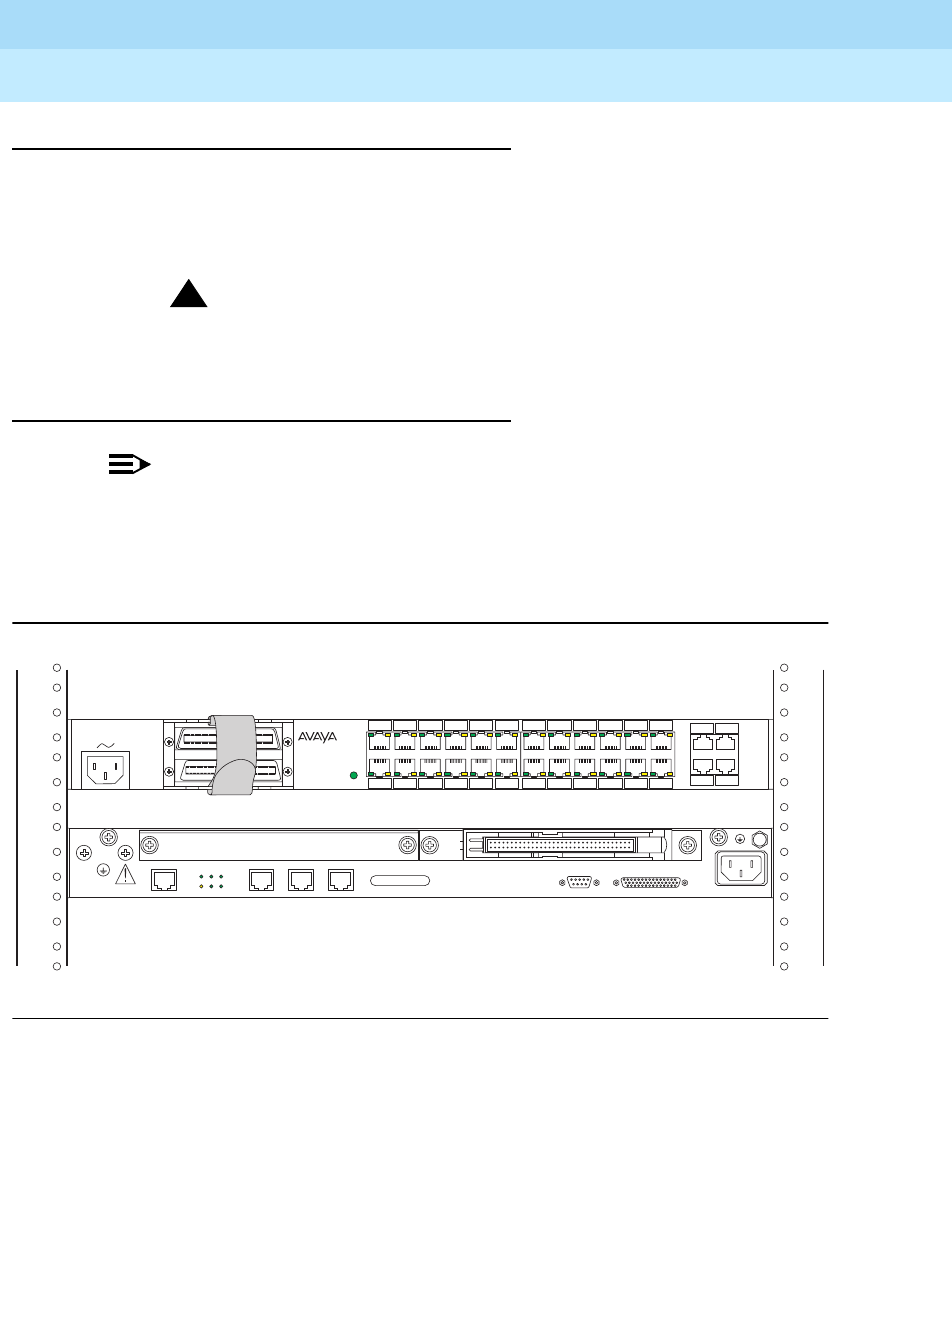
Mount Avaya R300 Interconnect module
NOTE:
If not using a mounting rack, place the R300 Interconnect module on top of the
Avaya R300 with the backs aligned.
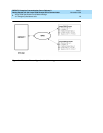
If mounting in the same rack as the Avaya R300, mount the Interconnect module above
the Avaya R300 with the backs aligned (see Figure 11).
Figure 11. R300 Interconnect module and Avaya R300 mounted in rack
1. Attach the mounting brackets to the unit using the screws provided.
2. Secure the unit to the rack, leaving about 2 in. (5 cm) of space between the unit and
the Avaya R300.
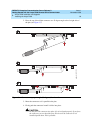
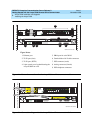
R300
INTERCONNECT
POWER
ON
DCP IN
ANALOG/
CO/
POWER
DCP
1-12
DCP
13-24
CO
TRUNK
1-2
ANALOG
STATION
1-2
SEE MANUAL
CAUTION
LAN UTP WAN 1 WAN 2 WAN 3 CONTROL SERIAL
LNK DPLX
COL 100BT
TX
RX
rcdfmax1 LJK 103100
Port 1
Port 13
Port 12
Port 24