


DEFINITY Enterprise Communication Server Release 9
Getting Started with the Avaya R300 Remote Office Communicator
Issue 1
November 2000
Avaya R300 Installation and Upgrade
39Installing the Avaya R300
3
5. Plug in one end of the power plug.
!
CAUTION:
Do not plug into any electrical outlet until everything is connected.
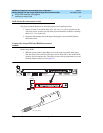
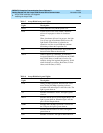
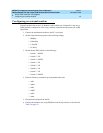
On the Avaya R300 Interconnect module:
1. Loosen the Velcro security strap over the socket and plug.
2. Plug in the DCP (male) Amphenol connector into the top socket.
3. Plug in the analog (female) Amphenol connector into the bottom plug.
4. Tighten the Velcro strap and lock it in place.
5. Plug in one end of the power plug.
!
CAUTION:
Do not plug into wall outlet until everything is connected.
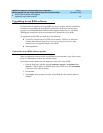
Complete connections
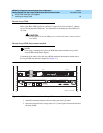
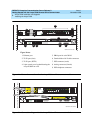
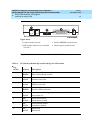
Refer to Figure 14 for port and connection descriptions for the Avaya R300 and R300
Interconnect module and Figure 15 for connection diagram for the Avaya R300 and R300
Interconnect module.
1. Plug in the Ethernet connection (D8W).
2. Plug in the T1, E1, or BRI connection(s).
3. Plug in the PC to the 9-pin DCE port with straight through serial cable.
4. Plug in DCP telephones with D8W connector (up to 24, 8400-series phones).
5. Plug in analog telephones or CO trunks with D8W connector (up to 2 analog
devices and up to 2 analog trunks).
6. Plug in the Interconnect module power cord to power the unit up.
7. Plug in the Avaya R300 power cord to power the unit up.
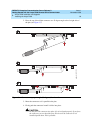
8. Familiarize yourself with Avaya R300 front-panel lights listed in Table 7 on page
41.
9. Familiarize yourself with Avaya R300 back-panel lights listed in Table 8 on page
41.
10. Observe LEDs on the front of the Avaya R300 to make sure everything is working
properly (see Figure 16 on page 42).
NOTE:
The Alarm LED on the Avaya R300 stays lit until you administer the Avaya R300.