


156
Before Use
Basic Guide
Advanced Guide
Camera Basics
Auto Mode / Hybrid
Auto Mode
Other Shooting
Modes
P Mode
Tv, Av, M, C1, and
C2 Mode
Playback Mode
Wi-Fi Functions
Setting Menu
Accessories
Appendix
Index
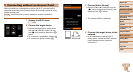
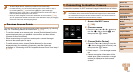
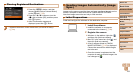
5 For a smartphone connection:
Start CameraWindow.
z For an NFC-compatible Android
smartphone (OS version 4.0 or later),
activating NFC and touching the
smartphone against the camera’s N-Mark
(
, =
145) will start CameraWindow
on the smartphone.
z For other smartphones, start
CameraWindow on the smartphone.
z The first time CameraWindow is opened,
register a smartphone nickname to be
displayed on the camera.
z Once the smartphone is recognized on
the camera, the device connection screen
will be displayed on the camera.
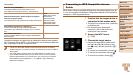
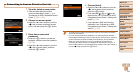
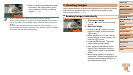
6 Choose the target device.
z Choose the target device name (either
press the <o><p> buttons or turn the
<7> dial), and then press the <m>
button.
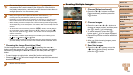
7 For a smartphone connection:
Adjust the privacy setting.
z Press the <q><r> buttons or turn the
<7> dial to choose [Yes], and then press
the <m> button.
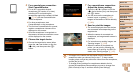
z You can now use the smartphone to
browse, import, or geotag (=
165)
images on the camera or shoot remotely
(=
165).
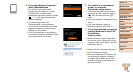
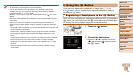
8 Send or print the images.
z The screen displayed when the devices
are connected varies depending on the
target device.
z When the camera is connected to a
smartphone, an image transfer screen is
displayed.
z For instructions on sending images, see
“Sending Images” (=
158).
z When the camera is connected to a
printer, you can print by following the
same steps as for printing via USB. For
details, see “Printing Images” (=
197).
• All images in the camera can be viewed from the connected
smartphone when you choose [Yes] in step 7.
To keep camera
images private, so that they cannot be viewed from the smartphone,
choose [No] in step 7.
• To change privacy settings for smartphones added to the list,
choose the smartphone whose settings you want to change from
[Edit a Device] in step 3, and then choose [View Settings].