


96
Before Use
Basic Guide
Advanced Guide
Camera Basics
Auto Mode / Hybrid
Auto Mode
Other Shooting
Modes
P Mode
Tv, Av, M, C1, and
C2 Mode
Playback Mode
Wi-Fi Functions
Setting Menu
Accessories
Appendix
Index
Flash
Still Images
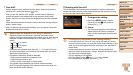
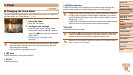
Changing the Flash Mode
You can change the flash mode to match the shooting scene. For details on
the flash range, see “Flash Range” (=
229).
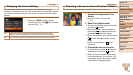
1 Raise the flash.
z Move the <h> switch.
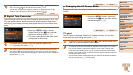
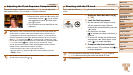
2 Configure the settings.
z Press the <r> button, choose a flash
mode (either press the <q><r> buttons
or turn the <7> dial), and then press the
<m> button.
z The option you configured is now
displayed.
• The setting screen cannot be accessed by pressing the <r> button
when the flash is lowered. Move the <h> switch to raise the flash,
then configure the setting.
• If the flash fires, vignetting may occur.
[ ] Auto
Fires automatically in low-light conditions.
[h] On
Fires for each shot.
[Z] Slow Synchro
Fires to illuminate the main subject (such as people) while shooting at a
slower shutter speed to illuminate backgrounds out of flash range.
• In [Z] mode, mount the camera on a tripod or take other measures
to keep it still and prevent camera shake. Additionally
, you should
set [IS Mode] to [Off] when using a tripod or other means to secure
the camera (=
99).
• In [Z] mode, even after the flash fires, ensure that the main subject
does not move until the shutter sound is finished playing.
[!] Off
For shooting without the flash.
• If a blinking [
] icon is displayed when you press the shutter button
halfway in camera-shake inducing, low-light conditions, mount the
camera on a tripod or take other measures to keep it still.
• Adjustment is also possible by pressing the <r> button, touching the desired
option, and then touching it again.