Clean the Print Head deeply.
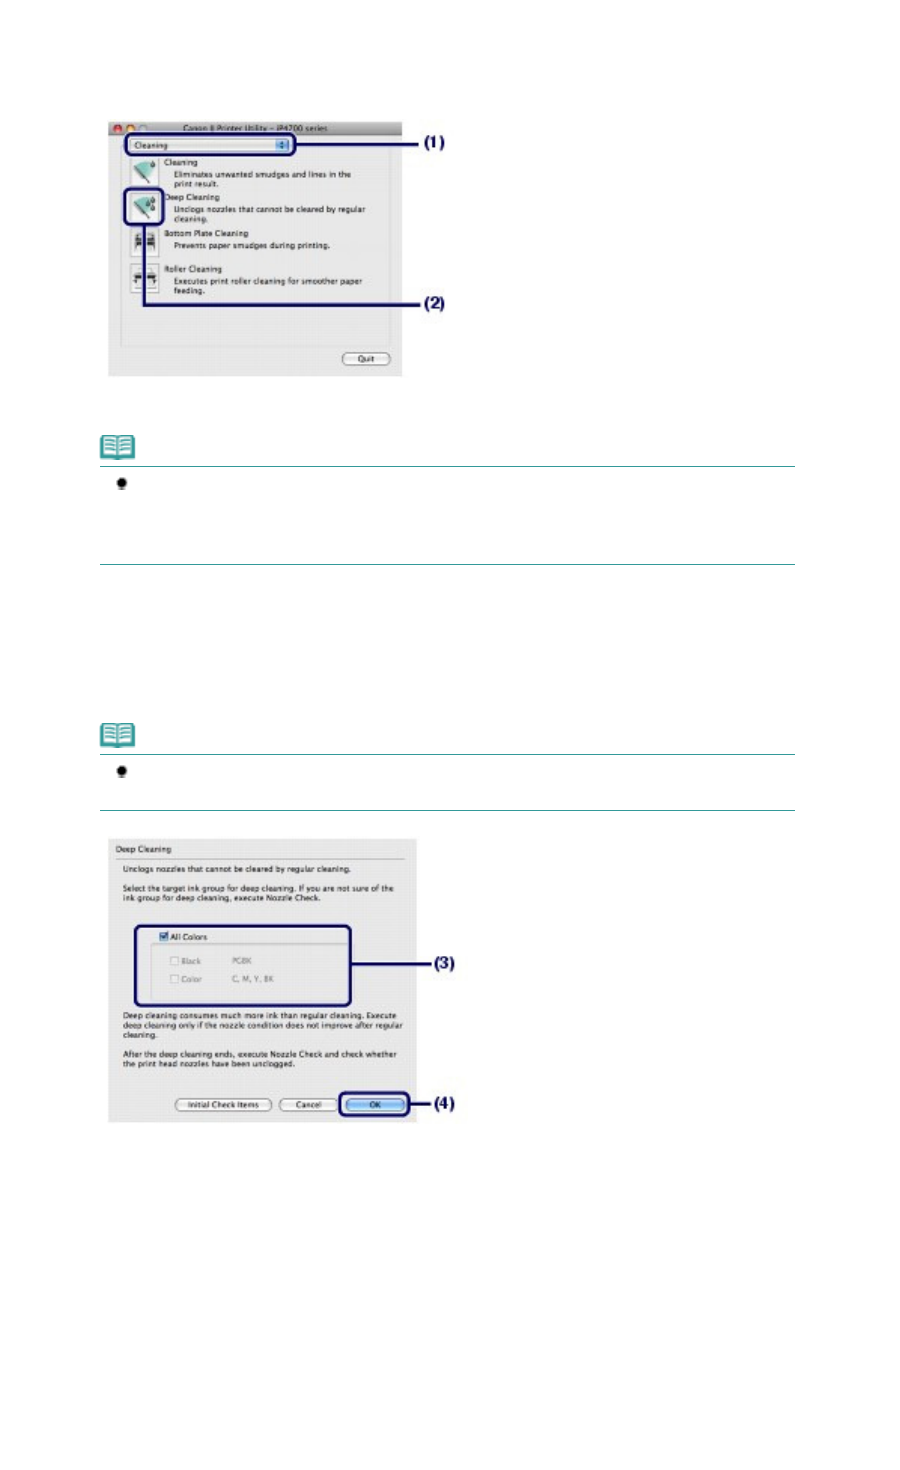
(1)
Make sure that Cleaning is selected in the pop-up menu.
(2)
Click Deep Cleaning.
(3)
Select the ink group to clean deeply.
Note
This printer has two kinds of black ink: PGBK (pigment ink) and BK (dye ink).
Check the nozzle check pattern, then click Black if there are missing lines in PGBK, or click
Color if there are horizontal white streaks in BK.
For details on the nozzle check pattern, see
Examining the Nozzle Check Pattern.
(4)
Click OK.
The printer starts cleaning the Print Head deeply when the
Power
lamp starts flashing green.
Do not perform any other operations until the printer completes the deep cleaning of the Print Head. This
takes about 2 minutes 30 seconds.
Note
Clicking Initial Check Items displays the items to be checked before cleaning the Print Head
deeply.
(5)
Confirm the displayed message and click Print Check Pattern.
The nozzle check pattern will be printed.
Do not perform any other operation until the printer completes the printing of the nozzle check pattern.
6. Examine the nozzle check pattern, and click Quit on the Pattern Check dialog box.
See step 1 in
Examining the Nozzle Check Pattern.
If a particular color is not printed properly, replace the ink tank of that color.
See
Replacing an Ink Tank
.
If the problem is not resolved, open the Top Cover to confirm that the ink is remaining, turn off the power, then
clean the Print Head deeply again after 24 hours.
Page 64 of 437 pagesCleaning the Print Head Deeply


