


Printing Special Photos 75
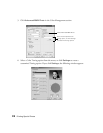
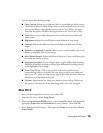
7. You can adjust the following settings:
■ Color Toning: Allows you to add tone (hue) to your black and white output.
The default is Neutral, which will provide you with a neutral tonal scale print.
You can also choose other popular presets such as Cool, Warm, and Sepia.
Note that the presets will affect the target found in the Tone Color Circle.
■ Tone: Allows you to easily change the entire tonal scale of your black and
white output.
■ Brightness: Adjusts the overall lightness and darkness of your image.
■ Contrast: Adjusts the difference between the light and dark areas of your
image.
■ Shadow and Highlight Tonality: Allows you to control tonality only in the
shadow or highlight areas of your image.
■ Max Optical Density: Adjusts the focus of the print. Create a soft focus print
by setting the density to lower.
■ Highlight Point Shift: If your image is prone to gloss differential, checking
Highlight Point Shift will help to reduce gloss differential by adding density
to the highlights of your image.
■ Tone Color Circle: Click on any portion of this color wheel or enter
corresponding values to customize the tone (hue) to add to your black and
white print. The closer you select to the edge of the wheel, the more color you
will add to your black and white print.
■ Preview: Approximates the image tone based on your settings. Please note
this preview will always be of the same image and is not color managed.
Mac OS X
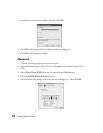
1. Start your print application and open your photo file.
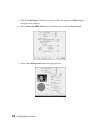
2. From the File menu, choose Page Setup.
3. Select the Stylus Photo R2400 printer in the Format For menu, and choose the
appropriate
Paper Size and Orientation for your printout. Then click OK.
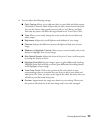
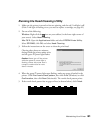
4. Select Print from the File menu. Then open the Printer menu and select Stylus
Photo R2400
.