3. INSTALLATION
36
5. Click the [Continue] button.
The following dialog box appears.
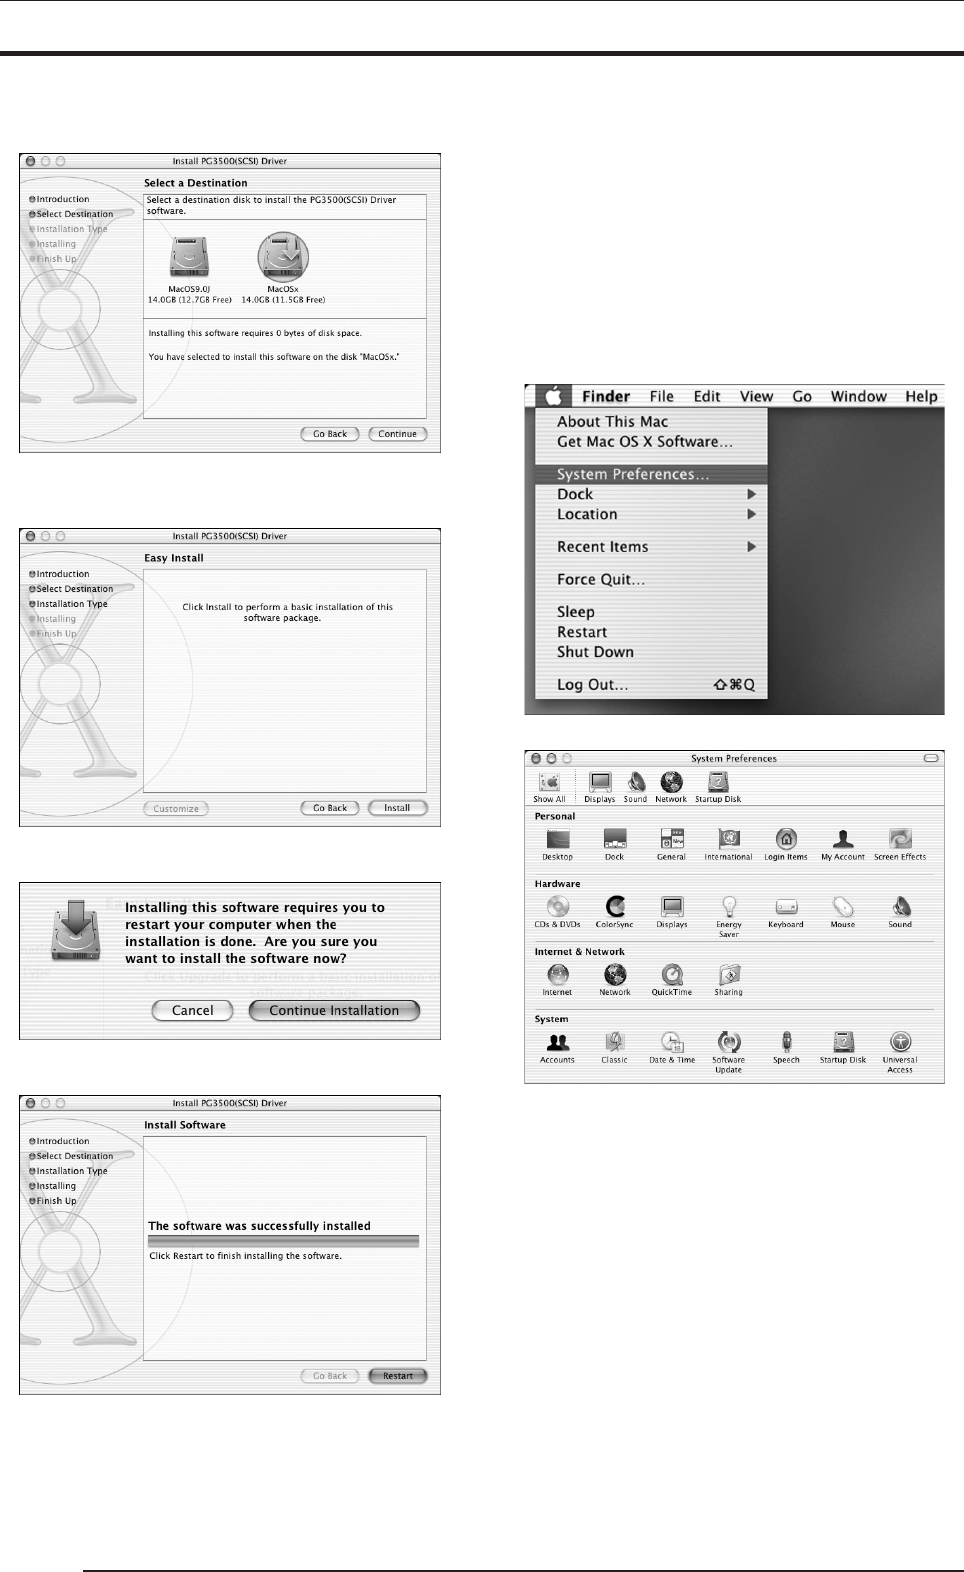
6. Select a destination volume to install the printer driver and then
click the [Continue] button.
The following dialog box appears.
7. Click the [Install] button.
The following dialog box appears.
8. Click the [Continue Installation] button.
When installation is completed, the following appears.
9. Click the [Restart] button to restart the computer.
Installation of PICTROGRAPHY 3500 Printer Driver for Mac OS X
is completed.
When the installation of PICTROGRAPHY 3500 Printer Driver for
Mac OS X is completed, perform settings for making prints with the
PICTROGRAPHY 3500 that is connected to the computer.
10. Confirm that the PICTROGRAPHY 3500 and the computer are
connected properly.
11.Turn ON the PICTROGRAPHY 3500 and wait until the "Self
Check" message appears on the LCD display.
When network printing is not performed, proceed to Step 14.
12. Select [System Preferences] from the Apple menu.
The [System Preferences] window appears.


