41
4. USING THE PRINTER DRIVER
4.1 Windows
This subsection describes printing in Windows 95, Windows 98, Win-
dows NT 4.0, Windows 2000 or Windows XP environments.
4.1.1 Work flow through printing
1. Starting Windows
After verifying that your computer and the PICTROGRAPHY
3500 are connected, first switch on the PICTROGRAPHY 3500,
then switch on the computer.
2. Launching an application (preparing print data)
Start the application software and create data to be printed. If
you have already created a data file, open that file.
4.1.2 Print setup and printing
The specific steps involved in printing vary from application to appli-
cation. For more information, see the instruction manual for the ap-
plication. The procedure described below uses Adobe PhotoShop 5.0
as an example.
1. Selecting the printer
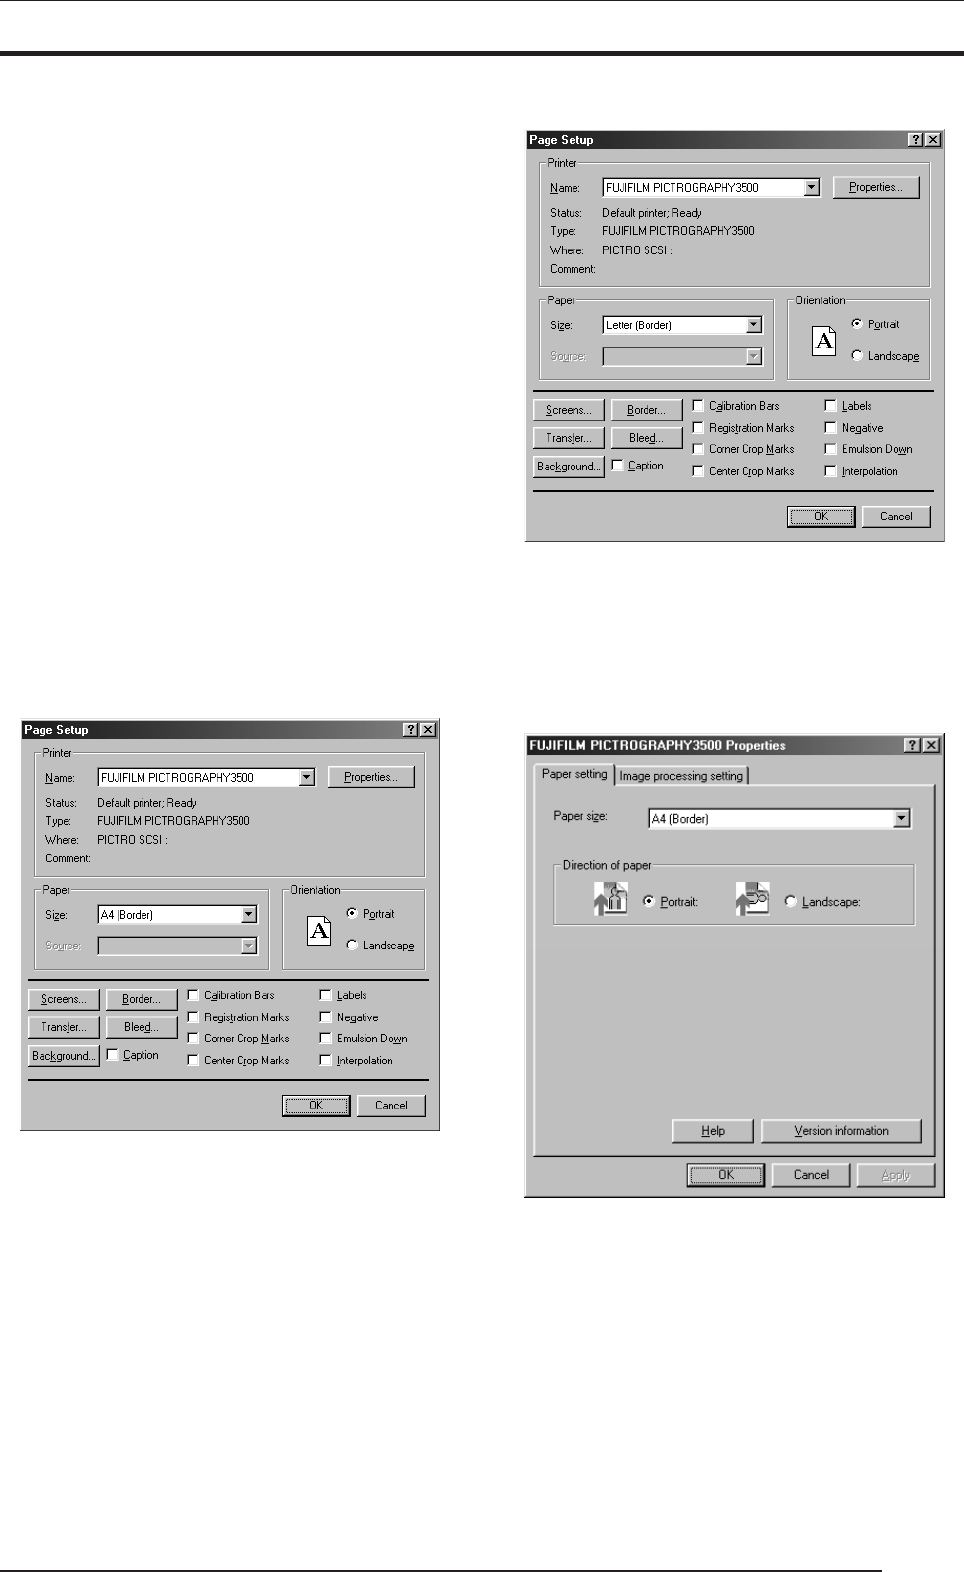
With the print data file open, click [Page Setup] on the [File]
menu.
This displays the [Page Setup] dialog box.
for CE type
for UC type
Select [PICTROGRAPHY3500] for [Printer Name:].
2. Selecting a paper size
After choosing the printer name in step 1, click the [Properties]
button.
This opens the [FUJIFILM PICTROGRAPHY3500 Proper-
ties] dialog box.
for CE type
