


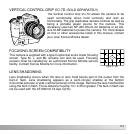
119
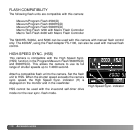
The flash sync terminal allows a studio or location flash system to be connected to the
camera with a standard PC cord. The terminal is compatible with both center positive
(normal polarity) and center negative (positive polarity) flash units with a voltage of 400V
or lower.
USING THE FLASH SYNC TERMINAL
To ensure correct exposures, use the manual exposure mode (p. 44). Set the shutter
speed equal to or slower than the flash duration; refer to the flash unit’s instruction
manual.
If the built-in flash is raised when another flash unit is connected to the flash sync
terminal, both flash units will fire. However, the camera’s automatic flash control systems
will not provide correct exposures. To use the built-in flash as a fill light, use manual flash
control (p. 75).
The use of custom white balance is recommended (p. 61). When calibrating the camera,
use the shutter speed and aperture settings require for the final exposure. A gray card
may have to be used as the reference target with powerful flash units to reduce the
intensity of the illumination. If custom white balance is not practical, use the preset
daylight or flash setting or set the color temperature (p. 62) to the flash unit’s color
temperature if known; auto white balance is not recommended.
To make an exposure bracket, press and hold the AEL button during the bracketing
series. The camera’s flash-compensation dial has no affect on the flash exposure.
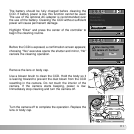
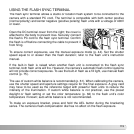
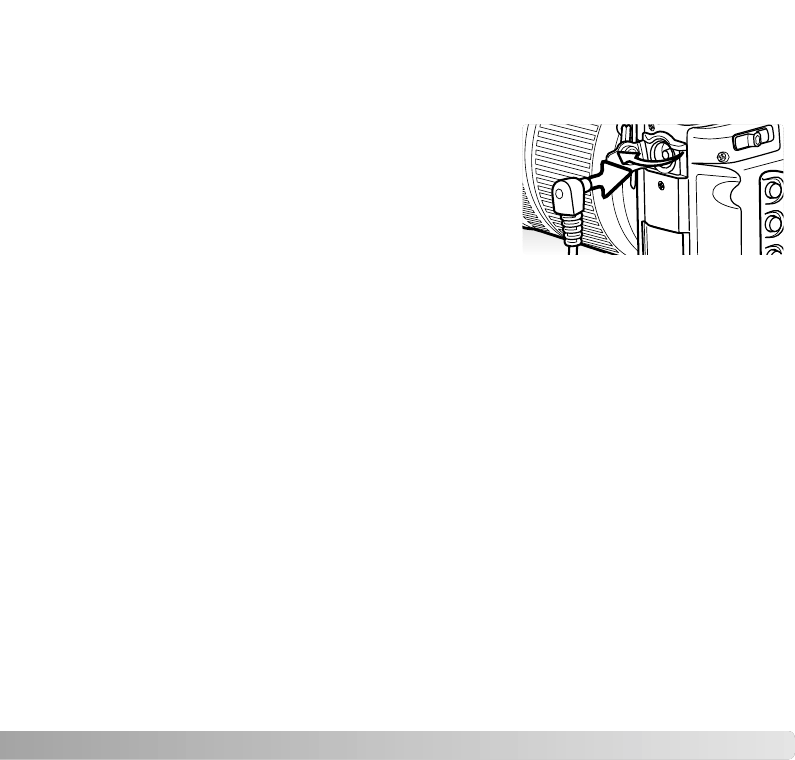
Open the DC terminal cover from the right; the cover is
attached to the body to prevent loss. Securely connect
the flash’s PC cord to the flash sync terminal. Confirm
the flash is off before connecting the cable to prevent it
from firing.