


21
Preparations
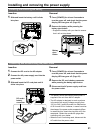
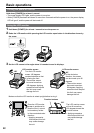
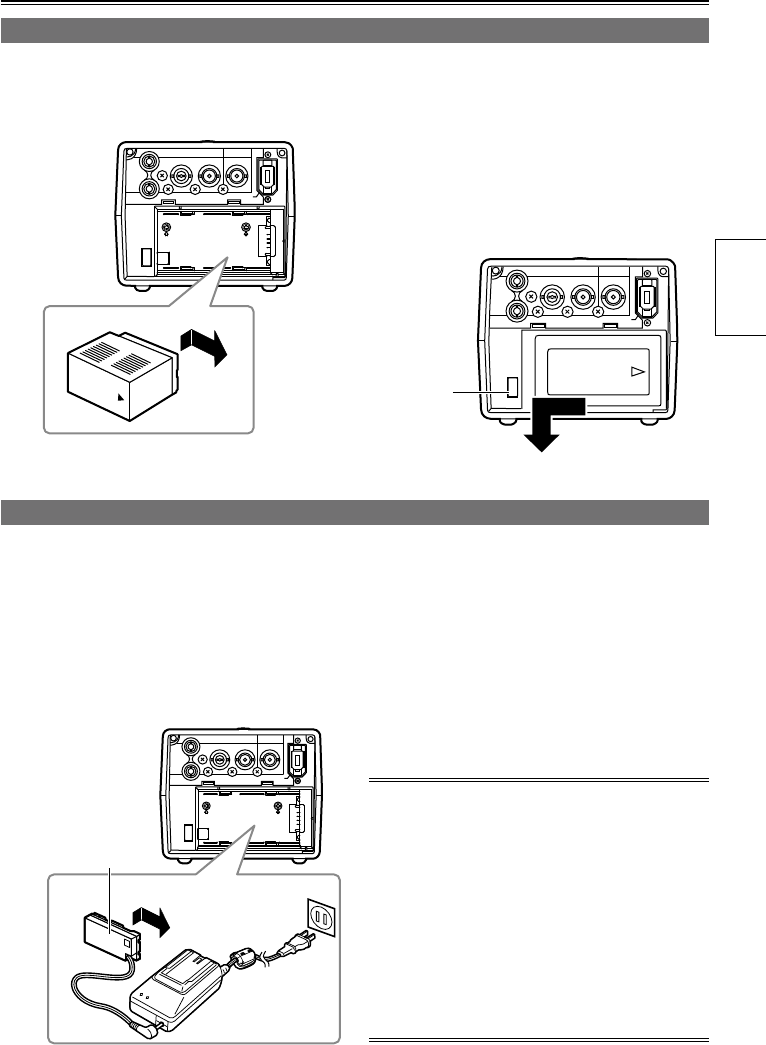
Installing and removing the power supply
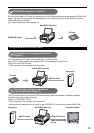
Insertion
1 Slide and insert the battery until it clicks
into place.
PUSH
OUTPUT INPUT
CH 1
CH 2
AUDIO
VIDEO
HD/SD-SDI HD/SD-SDI
DVCPRO/DV
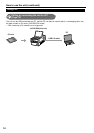
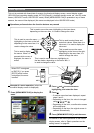
Removal
1 Press [POWER] for at least 2 seconds to
turn the power off, and check that the power
display LED has gone off. (Page 22)
2 Remove the battery while pressing the
battery eject button.
Support the battery with your hand to ensure
that it will not drop down.
PUSH
OUTPUT INPUT
CH 1
CH 2
AUDIO
VIDEO
HD/SD-SDI HD/SD-SDI
DVCPRO/DV
Battery
eject
button
•
Insertion
1 Connect the DC cord to the AC adapter.
2 Connect the AC power supply cord into the
power outlet.
3 Slide and insert the DC cord plate until it
clicks into place.
PUSH
OUTPUT INPUT
CH 1
CH 2
AUDIO
VIDEO
HD/SD-SDI HD/SD-SDI
DVCPRO/DV
DC cord’s
battery
connector
Removal
1 Press [POWER] for at least 2 seconds to
turn the power off, and check that the power
display LED has gone off. (Page 22)
2 Remove the DC cord’s battery connector
while pressing the battery eject button.
3 Disconnect the AC power supply cord from
the power outlet.
The battery cannot be charged when power is
supplied to the unit from the AC adapter.
The AC adapter is designed to work anywhere
in the world with supply voltages ranging from
100 V to 240 V and with power line frequencies
of 50 Hz and 60 Hz. However, in some countries
the shape of the power outlet receptacle differs.
In cases like this, obtain the plug that will fit the
receptacle. Obtain the conversion plugs after
consulting with your dealer.
When the unit is not being used, disconnect the
AC cable from the power outlet.
•
•
•
Installing and removing the battery
Connecting and disconnecting the power cable