


28
P2 cards
When the unit is to be used for the first time, the first step is always to set the internal clock. (Page 27)
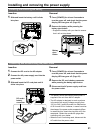
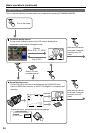
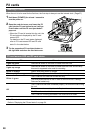
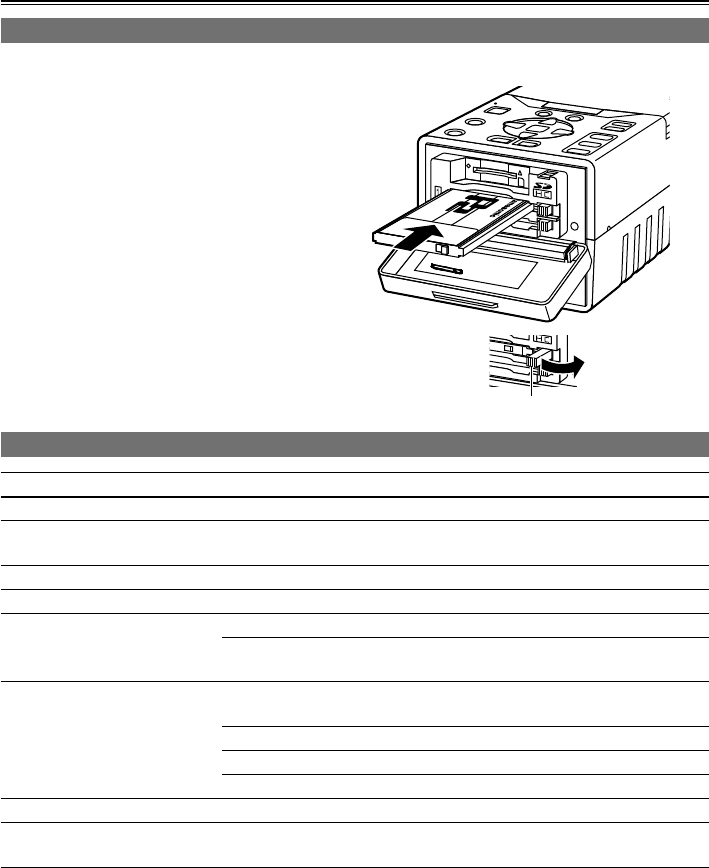
Inserting P2 cards
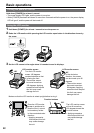
1 Hold down [POWER] for at least 1 second to
turn the power on.
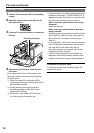
2 Open the card slot cover, and insert the P2
card into the P2 card slot as far as it will go.
Push further until the P2 card eject button
pops out.
When the P2 card is inserted into the unit, the
P2 card status is displayed by the P2 card
access LED.
For details on the P2 card status displayed,
refer to “P2 card access LED and P2 card
status” in the chart below.
3 Tip the popped-out P2 card eject button to
the right side and close the card slot cover.
•
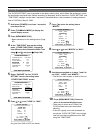
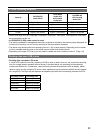
P2 card access LED P2 card status
Lights up green Data can be saved on the card or loaded from the card.
Lights up orange
Data can be saved on the card or loaded from the card, and currently
this card is supposed to be used for recording.
Blinks in orange Data is now being saved or loaded.
Blinks rapidly in orange The recognition process of the P2 card is underway.
Blinks in green
The P2 card is full. Data can be read out only.
The write-protect switch on the P2 card is at the PROTECT setting.
Data can be loaded only.
Off
The P2 card has not been formatted properly. Re-format the card using
the unit.
The card cannot be used by the unit. Replace the card.
The P2 card is not installed.
The P2 card is not being accessed in the USB DEVICE mode.
The P2 card statuses can be checked in detail.
Refer to “Displaying the P2 card status” on page 54.
•
P2 card access LED and P2 card status
P2 card eject button