


27
Preparations
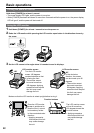
1 Hold down [POWER] for at least 1 second to
turn the power on.
2 Press [THUMBNAIL/MODE] to display the
normal display screen.
3 Press [MENU/MODE CHK].
Basic operations on the setting menus (Page
88)
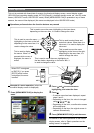
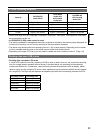
4 At the “TIME ZONE” item on the setting
menu “OTHER FUNCTIONS”, change the
time difference from Greenwich Mean Time
using and , and press . (Page 106)
OTHER FUNCTIONS
PUSH MENU TO RETURN
PC MODE SELECT
BEEP SOUND
CLOCK SETTING
TIME ZONE
POWER SAVE
SYSTEM FREQ
USER FILE
USB HOST
OFF
>>>
0:00
OFF
59.94Hz
>>>
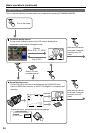
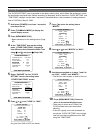
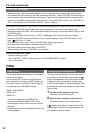
5 Select “CHANGE” for the “CLOCK
SETTING” item on the setting menu
“OTHER FUNCTIONS” screen.
OTHER FUNCTIONS
PUSH MENU TO RETURN
PC MODE SELECT
BEEP SOUND
CLOCK SETTING
TIME ZONE
POWER SAVE
SYSTEM FREQ
USER FILE
USB HOST
OFF
RETURN
OFF
59.94Hz
>>>
CHANGE
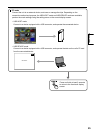
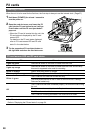
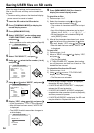
6 Press or to set “YEAR” to “2009”.
CLOCK SETTING
PUSH MENU TO RETURN
YEAR
DAY
MONTH
HOUR
MINUTE
APR
07
24
13
2009
+/ /
/
-
SEL
: PUSH
: PUSH
Any year from 2000 to 2037 can be set.
•
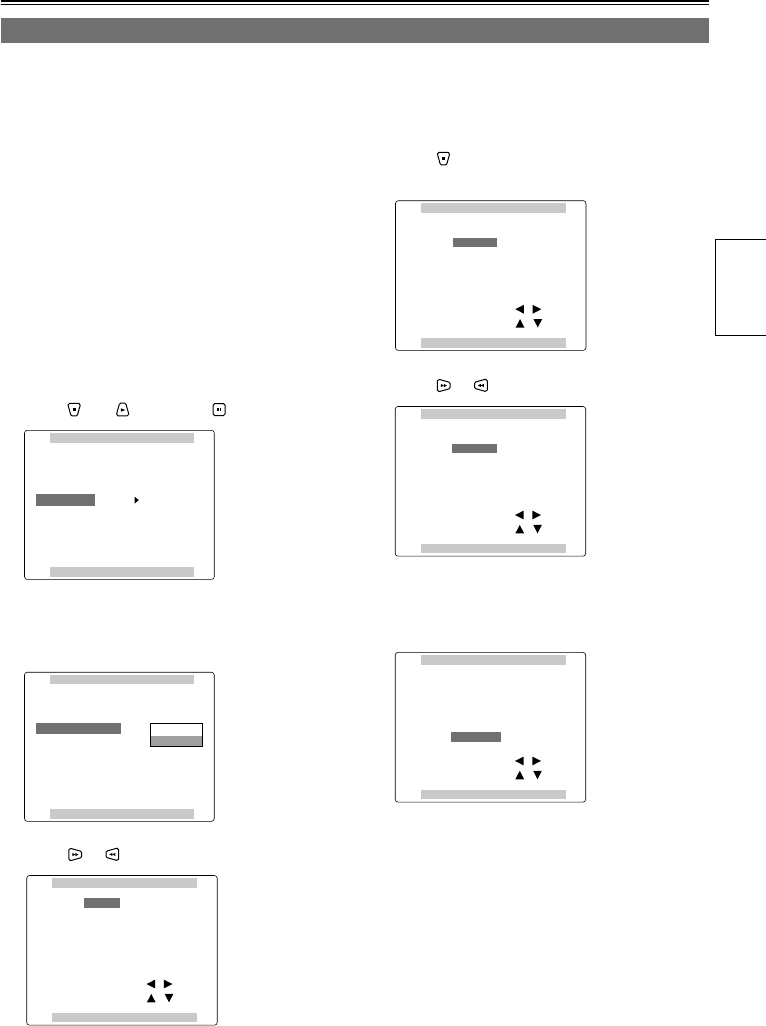
7 Press to move the setting item to
“MONTH”.
CLOCK SETTING
PUSH MENU TO RETURN
YEAR
DAY
MONTH
HOUR
MINUTE
APR
07
24
13
2009
+/ /
/
-
SEL
: PUSH
: PUSH
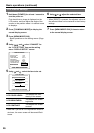
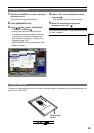
8 Press or to set “MONTH” to “MAY”.
CLOCK SETTING
PUSH MENU TO RETURN
YEAR
DAY
MONTH
HOUR
MINUTE
MAY
07
24
13
2009
+/ /
/
-
SEL
: PUSH
: PUSH
9 Use the same method as in steps 7 and 8 to
set “DAY”, “HOUR” and “MINUTE”.
The 24-hour clock system is used by this unit.
CLOCK SETTING
PUSH MENU TO RETURN
YEAR
DAY
MONTH
HOUR
MINUTE
MAY
20
25
17
2009
+/ /
/
-
SEL
: PUSH
: PUSH
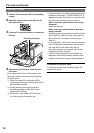
10 Press [MENU/MODE CHK] 3 times to
return to the normal display screen.
There may be a time error. Check if the
CLOCK shows the correct time before
shooting.
If the unit is going to be used overseas, do
not set the “CLOCK SETTING” to the current
time but input the time difference from GMT
using the “TIME ZONE”.
•
•
•
Setting date and time
The “CLOCK SETTING” value is recorded on the data content (clips), and it affects the sequence in which
the thumbnails are played back. Before recording, be absolutely sure to check the “CLOCK SETTING” and
“TIME ZONE” settings, and set them if necessary. Described below is the procedure for setting date and
time to 5:20 PM on May 25, 2009.