


88
Basic operations on the setting menus
1 Hold down [POWER] for at least 1 second to
turn the power on.
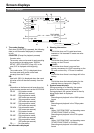
2 Press [THUMBNAIL/MODE] to switch to the
normal display screen.
3 min
1 2
1
C
H
2
C
H
TC 12 : 34 : 56 : 00
1080i
3
C
H
4
C
H
60
AVC-I100
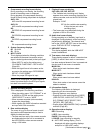
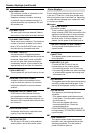
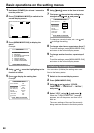
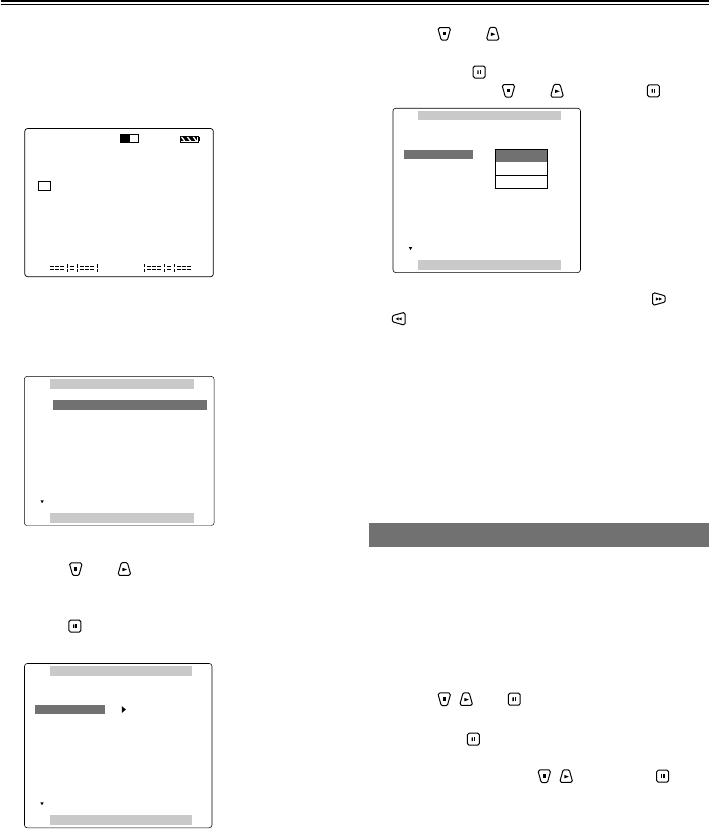
3 Press [MENU/MODE CHK] to display the
menu.
Example:
MAIN MENU
PUSH MENU TO EXIT
1 .
TIMECODE SETUP
2 .
RECORDING SETUP
SW MODE
3 .
4 . PLAYBACK FUNCTIONS
5 . AV OUT SETUP
6 . DISPLAY SETUP
7 . CARD FUNCTIONS
8 . OTHER FUNCTIONS
4 Using and , move the highlighting to the
function to be set.
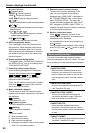
5 Press to display the setting item.
Example:
RECORDING SETUP
PUSH MENU TO RETURN
INT SG
25M REC CH
LOOP REC
REC FMT(HD)
AUTO REC
25M
AVC100
INPUT SELECT
SDI
100%CB
2CH
OFF
1080/60i
OFF
REC FMT(SD)
SYS FORMAT
6 Using and , move to the item to be set.
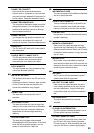
7 First press , then select the setting to be
changed using and , and press .
RECORDING SETUP
PUSH MENU TO RETURN
INT SG
25M REC CH
LOOP REC
REC FMT(HD)
INPUT SELECT
AUTO REC
2CH
OFF
100%CB
SDI
OFF
REC FMT(SD)
SYS FORMAT
1080/60i
480/60i
720/60P
To change a numerical value, etc., use and
to change the setting.
8 To change other items, repeat steps 6 and 7.
To exit the settings, press [MENU/MODE CHK]
and return to the normal display screen.
9 To change another function, repeat steps 3
to 7.
To exit the settings, press [MENU/MODE CHK]
and return to the normal display screen.
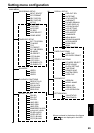
Initializing the setting menu
You can return (initialize) the setting menu user
files to the factory status.
1 Switch to the normal display screen.
2 Press [MENU/MODE CHK].
3 Using , and , select “OTHER
FUNCTIONS” – “USER FILE” – “INITIAL”,
and press .
4 Select “YES”, using , , and press .
When the “TURN POWER OFF” message
appears, turn off the power, and then turn it
back on.
The menu settings of the user files currently
being used are returned to the factory status.