


D:\Printer\DPPFP85.95 series\IM\3285420121DPPFP85.95IM_GB\3285420121\3285420121DPPFP8595IM_GB\050C03.fm
Master: Right
DPP-FP85/FP95 3-285-420-12 (1)
29
GB
Direct printing
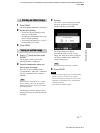
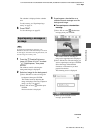
The calendar is displayed in the calendar
area.
To add a stamp, see “Superimposing a
stamp” on page 31.
6 Press PRINT.
To save the image, see page 25.
Tip
To superimpose handwritten characters or an
illustration, draw them with a black ink pen on a sheet
of white paper, shoot them with a digital camera, and
save the image on a memory card.
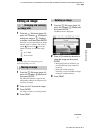
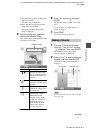
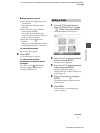
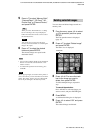
1 From the CreativePrint menu
(page 19), press g/G/f/F to select
“Superimpose,” then press
ENTER.
The window used for selecting the
background image is displayed.
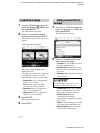
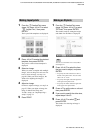
2 Select an image for the background.
1Press g/G/f/F to select an image for
background, then press ENTER.
The window used for adjusting the
image is displayed. For how to adjust an
image, see step 5 on page 27.
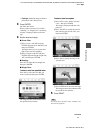
2Press g/G to select and then press
ENTER.
Preview window is displayed.
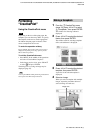
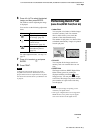
3 Superimpose a handwritten or a
standard format message over the
background image.
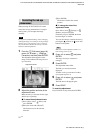
x To superimpose a handwritten
message
1Press g/G to select (Handwritten
message), then press ENTER.
The window used for selecting an
image to be superimposed is displayed.
2Press g/G/f/F to select the image you
want to superimpose and press ENTER.
Select the image of handwritten
characters or illustrations you have
prepared in advance.
The trimming cursor is displayed.
3When you do not want to trim a
message, press ENTER.
Superimposing a message on
an image
Continued