


D:\Printer\DPPFP85.95 series\IM\3285420121DPPFP85.95IM_GB\3285420121\3285420121DPPFP8595IM_GB\050C03.fm
Master: Left
DPP-FP85/FP95 3-285-420-12 (1)
32
GB
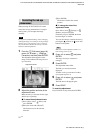
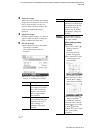
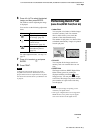
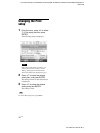
1 From the CreativePrint menu
(page 19), press g/G/f/F to select
“Layout Print,” then press
ENTER.
The Layout Print templates are displayed.
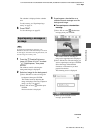
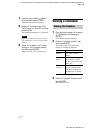
2 Press g/G/f/F to select the desired
template, then press ENTER.
The preview of the selected template is
displayed
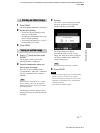
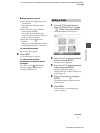
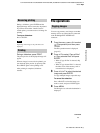
3 Select an image.
When you select a template with multiple
images, select an image for each area. For
how to select an image, see step 4 on
page 26. When you select image(s), the
window for adjusting the image is
displayed.
4 Adjust an image.
For how to adjust an image, see step 5 on
page 27. When you adjust an image, the
image is added to the image area.
To add a stamp, see “Superimposing a
stamp” on page 31.
5 Press PRINT.
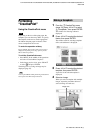
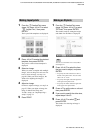
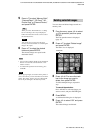
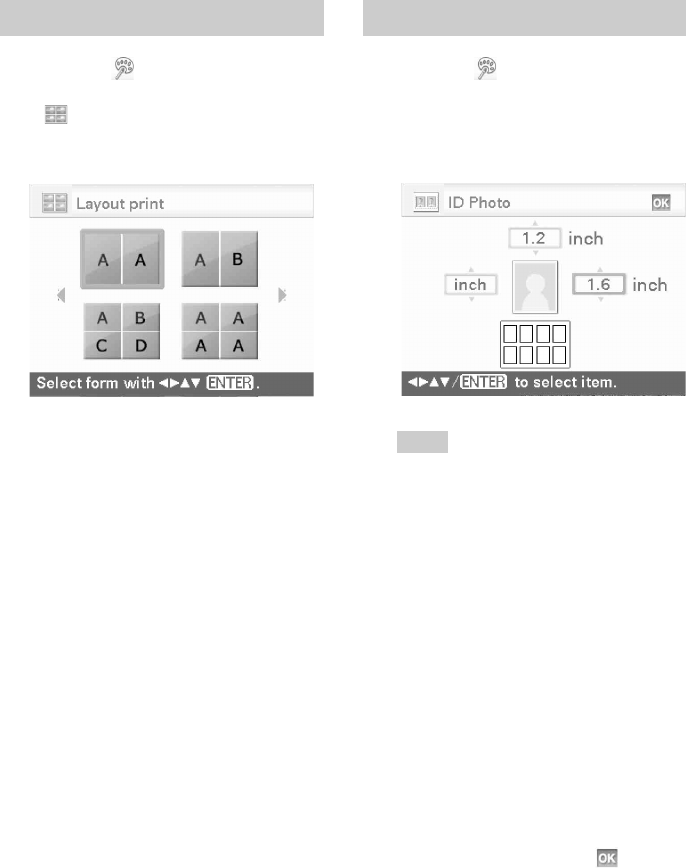
1 From the CreativePrint menu
(page 19), press g/G/f/F to select
“ID Photo,” then press ENTER.
The window used for setting the height
and width of an ID Photo is displayed.
Tip
You can set a maximum size of 7.0 (width) x
9.0 (height) cm.
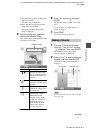
2 Press g/G/f/F to select the item
that you want to adjust, and press
ENTER.
• To specify the unit: Select the text box at
the left of the photo frame. You can select
either “cm” or “inch.”
• To specify the height: Select the figure box
at the right of the photo frame.
• To specify the width: Select the figure box
in the upper of the photo frame.
3 Press f/F to set the size or unit and
then press ENTER.
4 If you want to specify the other size,
repeat steps 2 and 3.
5 Press g/G/f/F to select and
press ENTER.
The window for selecting an image is
displayed.
Making layout prints Making an ID photo