


CV503-8CH-19M
45
SVAT ELECTRONICS
now you can see
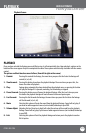
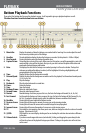
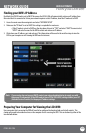
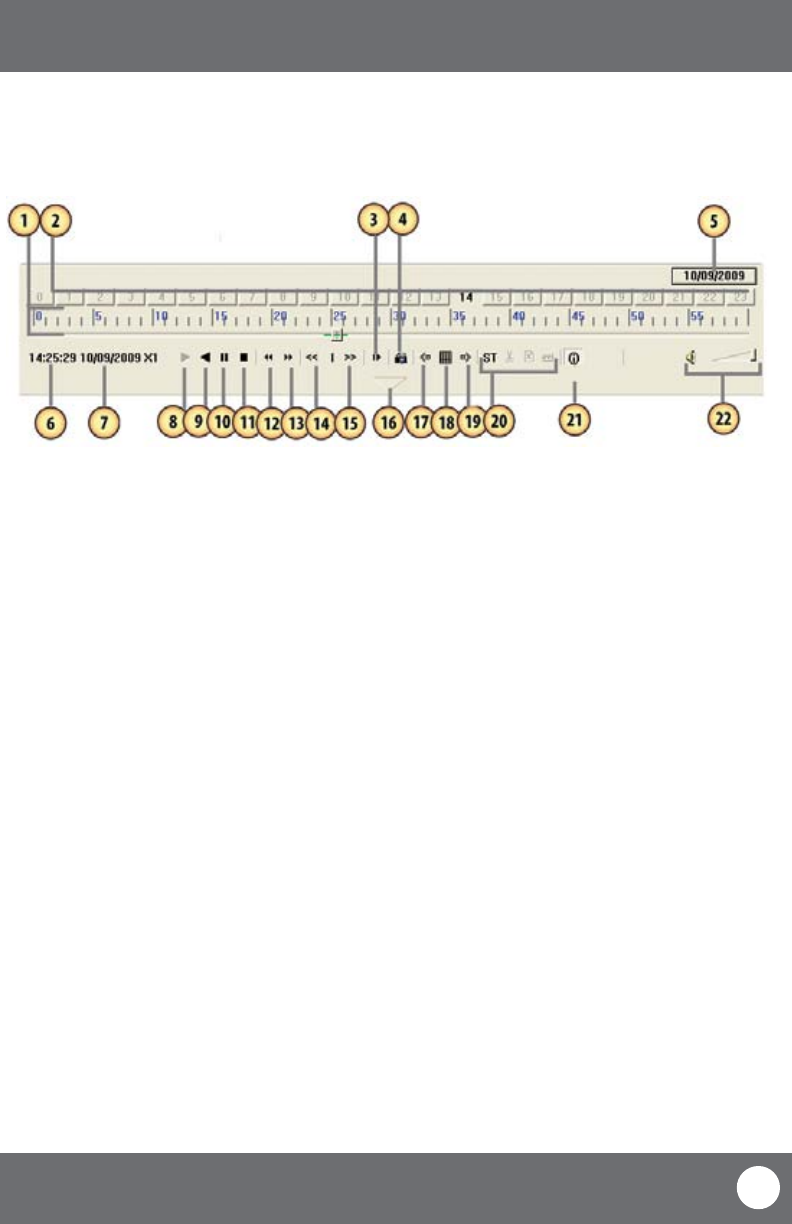
1. Minute Bar: Displays the minutes of when the footage was recorded and for how long. You can also adjust the small
box to move to particular parts of the footage
2. Hour Bar: The selected button displays the hour the footage was recorded. (in this photo it is 14:00 or 2:00pm)
3. Hour Forward: Pressing this button moves the footage forward an hour
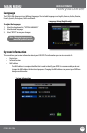
4. Capture Picture: This option takes a photo of the screen. When you select this option, you will be prompted to create a le
name and nd a save path for the photo. Once you do, you select save and the photo will be taken and
saved under the desired name and location
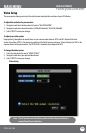
5. Date: This displays the date that the footage was recorded; pressing it will reveal a calendar. The days that
video was recorded and backed up (on device) will be highlighted. Selecting a highlighted day will
prompt playback of that day’s footage
6. Time: Displays the time that the footage was recorded
7. Date and Speed: Displays the date that the footage was recorded as well as the playback, fast forward and rewind speeds.
(1x, 2x, 4x, 8x, 16x)
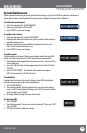
8. Play: Plays the footage
9. Backwards: Plays the video backwards in normal time
10. Pause: Pauses the footage
11. Stop: Stops the footage
12. Backward Frame: Moves the video back a frame
13. Forward Frame: Moves the video forward a frame
14. Rewind: Rewinds footage. Each time you press this icon, the faster the footage will rewind (2x, 4x, 8x, 16x)
15. Fast Forward: Fast forwards the footage, each time you press this icon, the faster the footage will fast forward (2x, 4x,
8x, 16x). To go back to normal viewing select the middle bar (between rewind and fast forward)
16. Max/Min: Pressing this will reveal and hide the bottom icon bar
17. Decrease Screen: Pressing this will decrease the amount of screens seen on the viewing window
18. All: Pressing this will reveal all cameras with recorded footage that are playing back
19. Increase Screen: Pressing this will increase the number of screens seen on the viewing screen
20. ST: This stands for start operation; this allows you to save, delete or change the video for sections of recorded
footage. (Directions on Pg 49)
21. (i)/OSD: OSD stands for on-screen display, checking and/or un-checking this selection does not make a dierence
to the video
22. Volume Control: If you have an audio supported camera (not included), clicking and dragging the square along the bar
will turn the volume of the playback footage up and down. Clicking on the speaker icon will mute/turn
on the sound
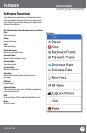
Bottom Playback Functions
If you select the bottom bar from on the playback screen, it will expand to give you playback options as well.
The video functions from the bottom bar are as follows:
PLAYBACK