CV503-8CH-19M
60
SVAT ELECTRONICS
now you can see
LOG INTO THE ACCOUNT AND SETUP A DDNS HOST
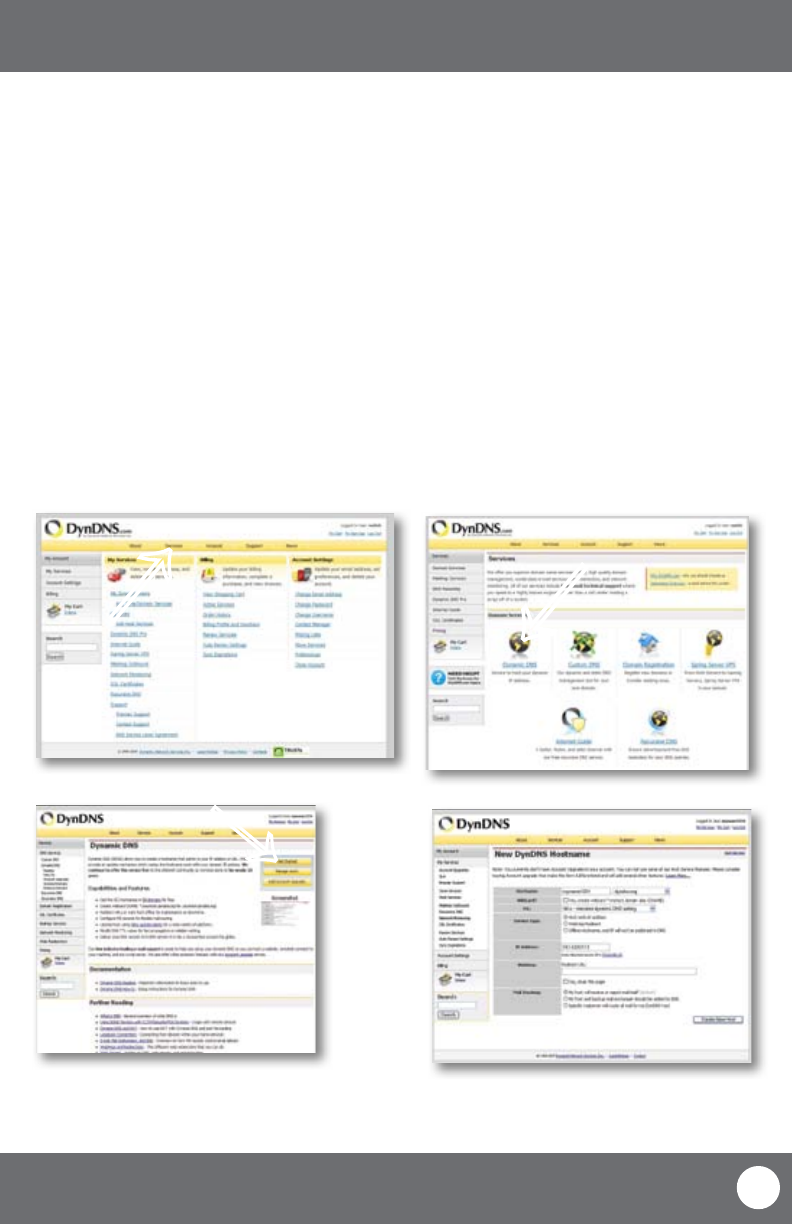
To set up a DynDNS name for your DVR:
1. Enter the DYNDNS.org user name and password you created and click login.
2. Click on the “Services” button located on the menu bar.
3. Click on the “Dynamic DNS” link.
4. Click on the “Get Started” link located on right side of the screen.
5. Type in a desired host name. We recommend you use your name, family name or your business’ name, as long as
it is easy to remember.
6. Choose a domain name from the drop down menu. We recommend using dyndns.org.
7. In the IP address eld, type in the external IP address that your DVR is connected to.
8. Leave all of the other options as they are, and click “Create New Host”.
9. Follow on screen instructions to activate and view your free DDNS host name.
10. Be sure to input the proper account information on your DVR’s DDNS setup menu before viewing.
Select the Services Button
Select Dynamic DNS
↑
↑
Insert account info
NETWORK GUIDE
Select “Get Started”
↑


