Setting System Options LukWerks User Guide
29
camera even when there is no motion. Off schedules disable both Motion and Continuous recording, although
you can still monitor the live video.
During times that are not scheduled, Werks by default will record Motion unless you have disabled motion
recording (See Enable & Disable Motion Detection Functionality for more details.)
To activate the Recording Schedule dialog, click the SCHEDULE RECORDING TIME button on the Setup >
Recording tab.
Here is a quick overview of the Recording Schedule dialog:
Dialog Item Usage
Weekly
Schedule for
Cam #
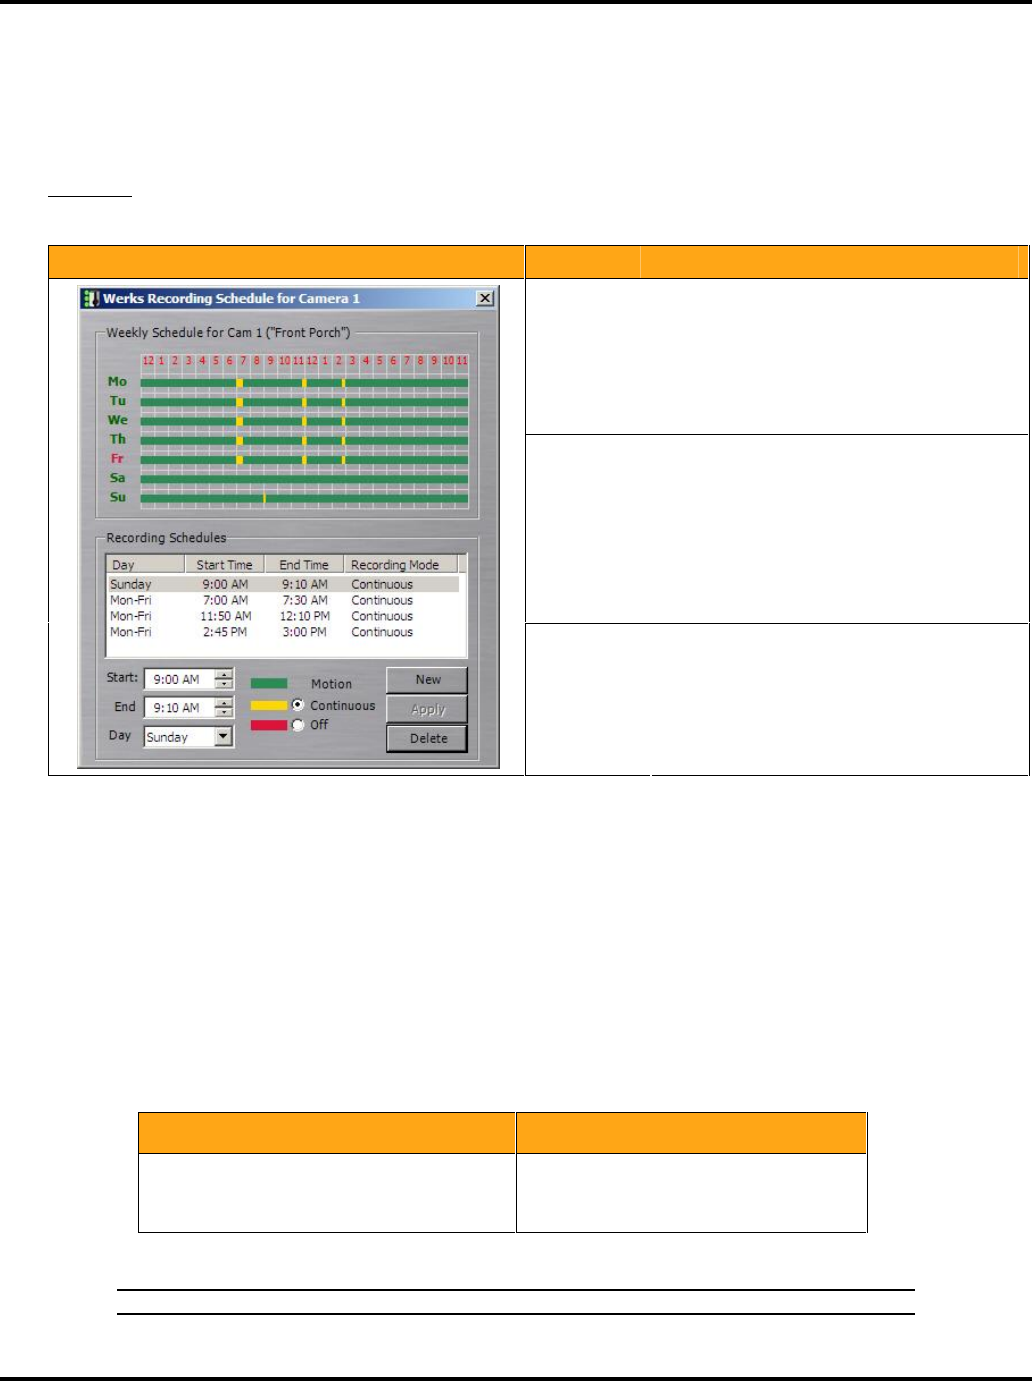
This graph displays the scheduled recordings
for the selected camera for a week. A line
exists for each day of the week (Mo - Su). A
column exists for each hour of the day.
Colored markers of green for motion, yellow
for continuous, and red for off indicate the
currently defined schedules.
Recording
Schedules
Here you see a list of the recording schedules.
Each line shows the details about the
scheduled recording— the day(s), start and
end times, and the recording mode. Select a
line to edit or delete an existing schedule.
In this example, you can see four schedules.
The first is for Sunday only while the others
are for Monday through Friday.
Scheduling
Area
The New, Apply, and Delete buttons allow you
to add, modify, and delete recording
schedules. You use the Start, End, Day, and
type option to specify the recording details.
Remember that each camera can have its own
schedule.
Create a New Recording Schedule
Setup > Recording > SCHEDULE RECORDING TIME button.
Create a new recording schedule to turn on continuous recording (for a specified time period) or to turn off all
recording. You create a new recording scheduled video recording using the Recording Schedule screen. To
accomplish this task, follow these instructions:
1) Open the Setup > Recording dialog.
2) Click the button for the camera you wish to program.
3) Click the SCHEDULE RECORDING TIME button.
4) Click the NEW button to indicate you are creating a new entry.
5) Set your Start and End time, Days option, and choose between Continuous and Off.
Continuous Mode Off Mode
Continuously record on the set days and
times, even if there is no motion on the
camera.
Disable recording on the set days and
times, even if there is motion on the
camera.
6) Click the APPLY button to save the schedule. You will notice the scheduled recording is added to the
schedule list.
Note: It will take a few minutes for the new schedule to take effect.


