


2-12
Cisco Video Surveillance IP PTZ Dome Camera User Guide, Cisco 2900 Series IP Dome
OL-24281-01
Chapter 2 Operation
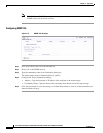
Network Tab
Step 4 Click the Save button to save the settings, or click the Reset button to clear all of the information you
entered without saving it.
Note If the camera is not connected to a DHCP server but DHCP is set to On, the default IP address
192.168.0.20 on subnet mask 255.255.255.0 is automatically assigned to the camera. After the
first camera is connected and assigned the default IP address, the system will automatically look
for other cameras on the auto IP address system and assign IP addresses in sequential order as
required. For example, if three cameras are connected to a network without a DHCP server, the
first camera will be assigned address 192.168.0.20, the second camera will be assigned address
192.168.0.21, and the third camera will be assigned address 192.168.0.22.
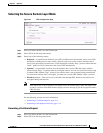
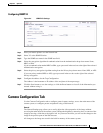
Turning Off DHCP
Caution Contact your network administrator to avoid any network conflicts before setting or changing the IP
address of the device.
Step 1 Place your mouse pointer over the Network tab.
Step 2 Select General from the drop-down menu.
Step 3 Select the Off option for the Dynamic Host Configuration Protocol (DHCP).
Step 4 Change the following network settings as required:
• IP Address—The address of the camera connected to the network.
• Subnet Mask—The address that determines the IP network that the camera is connected to (relative
to its address).
• Gateway—The router that accesses other networks.
• DNS Servers—The addresses of the dedicated servers that translate the names for Web sites and
hostnames into numeric IP addresses.
Step 5 Click the Save button to save the settings, or click the Reset button to clear all of the information you
entered without saving it.