


Chapter 2: Preparing to Take Pictures 14 Using the Status LCD
Setting the Timer Mode
Note: The 10-Second Timer mode is disabled
for the Timelapse image type. (See “Setting the
Image Type” on page 13.)
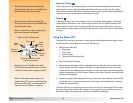
Your camera has four timer modes. The default timer mode is Off. Each mode is displayed on the
status LCD with the icon shown in Table 3. To set the timer mode, press the timer mode button
next to the status LCD to toggle through the icons on the status LCD until you see the timer setting
you want (see Table 3).
Note: After each timed exposure in 10-Second
Timer mode, the camera will default to the Off
timer mode setting. You must reset the timer to
take another timed picture. In contrast, the
Remote and the 3-Second Remote timer mode
settings remain set shot-to-shot.
Also, when the camera is set to the Continuous
image type, you can only take one picture with
the 10-Second Timer or 3-Second Remote timer
modes. Therefore, to capture a Continuous
sequence of images, either use no timer mode
(that is, leave the timer mode set to its default
Off setting), or use the Remote timer mode.
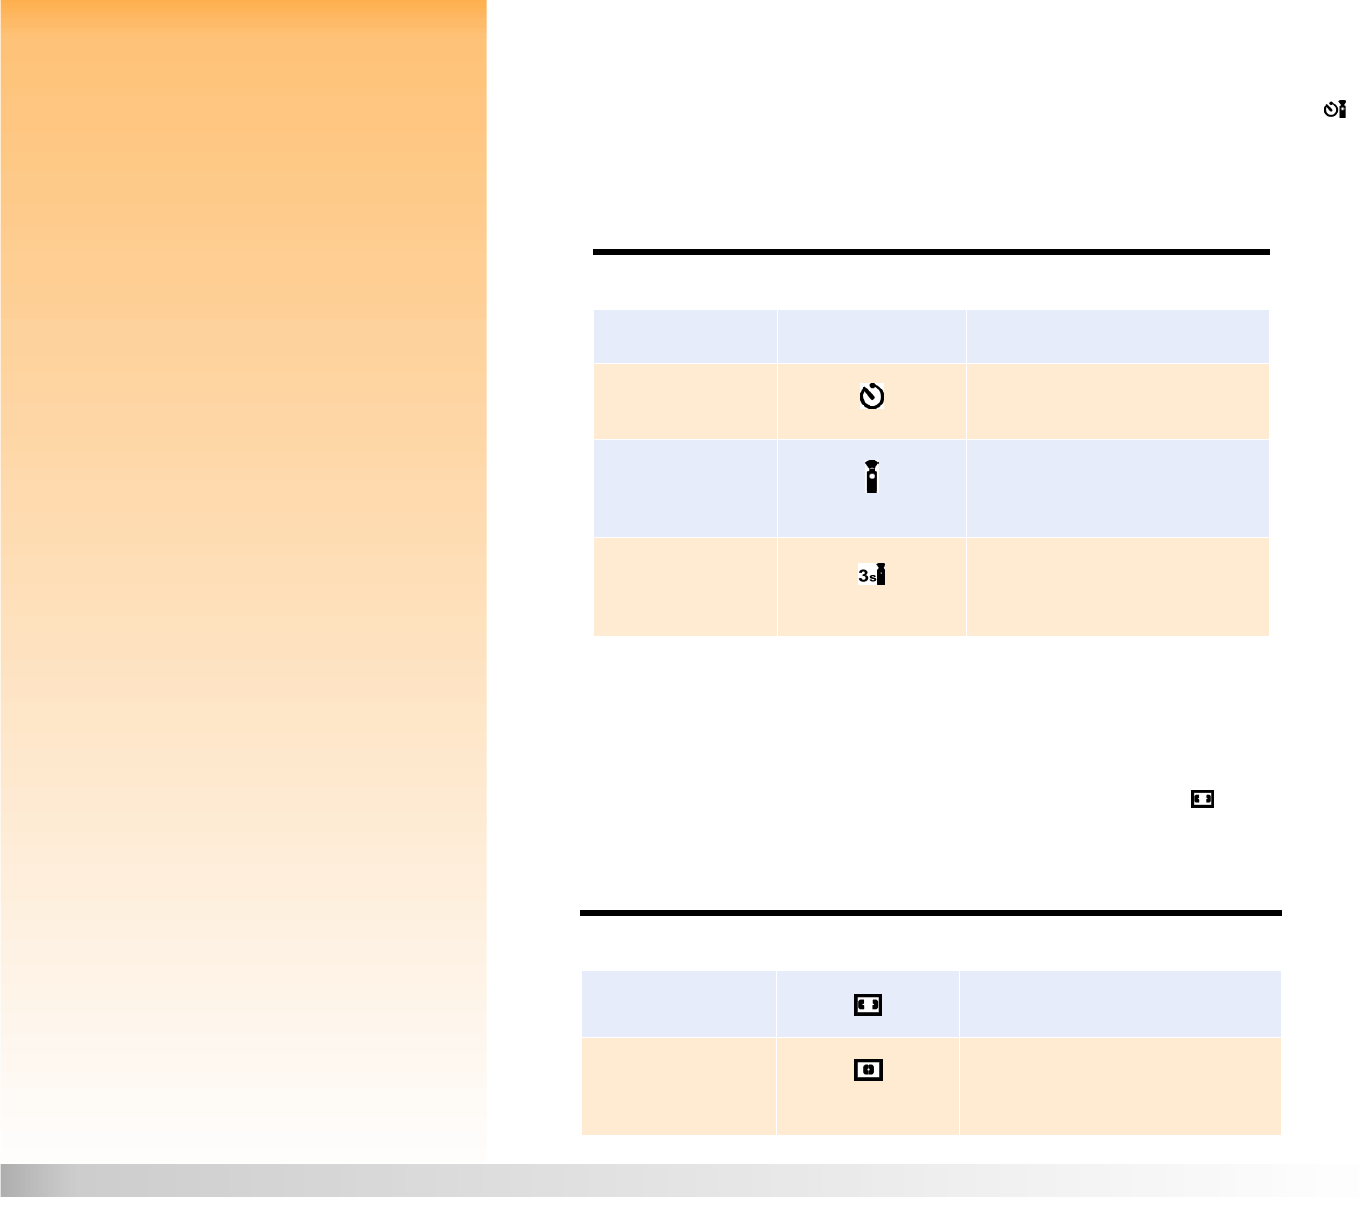
Table 3: Timer Mode Settings
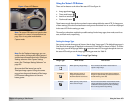
Setting the Auto Focus Area
You can choose from two auto focus areas that are available via the status LCD. (The auto focus area
is the area of the scene that the camera will use to determine auto focus settings.) The default is Wide
auto focus area. To set the auto focus mode, press the auto focus area button next to the status
LCD to toggle through the icons on the status LCD until you see the setting you want (see Table 4).
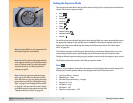
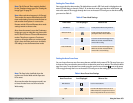
Note: The lines in the viewfinder show the
regions used for the Wide and the Spot auto
focus areas.
Also note that, when the exposure mode is set
to Auto, the auto focus area is forced to the
Wide setting.
Table 4: Auto Focus Area Settings
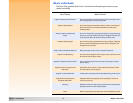
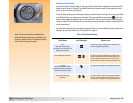
Timer Mode Icon Displayed When to Use
Off (default) No Icon To take pictures without using the timer.
10-Second Timer To take a picture 10 seconds after
pressing the shutter release button.
Remote To use the remote infrared trigger on the
HP Remote Control (included with the
camera) with no delay.
3-Second Remote To use the remote infrared trigger on the
HP Remote Control (included with the
camera) with a 3-second delay.
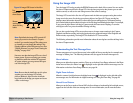
Auto Focus Area Icon Displayed When to Use
Wide (default) Use for most situations.
Spot Use when the objects in the scene are at
different distances, and you want to be sure
that a small portion of the scene is in focus.