


Chapter 2: Preparing to Take Pictures 15 Using the Status LCD
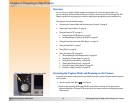
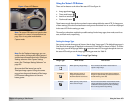
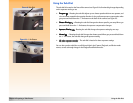
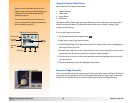
Figure 5: Pop-up Flash Button Setting the Flash Mode
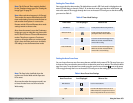
Your camera has four flash modes for the pop-up flash. Each mode is displayed on the status LCD
with the icon(s) shown in Table 5. The default flash mode depends on the current exposure mode
that is set on the camera (see Table 5).
To set the flash mode, you must first press the pop-up flash button (see Figure 5) to pop up the flash
unit. (The flash does not pop up automatically.) Then press the flash mode button next to the
status LCD to toggle through the icons on the status LCD until you see the flash mode setting you
want (see Table 5). To turn the flash off, you must press the pop-up flash unit down until it locks shut
in the camera body.
For more information about using either the pop-up flash, or an external flash that you attach to the
hot shoe on top of the camera, see “Using Flash” on page 18.
Note: The Auto and the Auto with Red-Eye
Reduction flash modes are not available in the
Program, Shutter Priority (Tv), Aperture Priority
(Av), or Manual exposure modes.
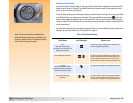
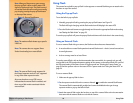
Table 5: Flash Mode Settings
Flash Mode Icon Displayed When to Use
Auto
(default for Auto, Portrait,
Landscape, Close-up, Action, and
Night exposure modes)
To allow the camera to determine the need for flash
based on the lighting conditions.
Auto with Red-Eye Reduction
To allow the camera to determine the need for flash
based on the lighting conditions. When flash is used,
red-eye reduction minimizes the occurrence of red-
eye in pictures of people or animals by flashing twice.
Forced On
(default for Program, Shutter
Priority (Tv), Aperture Priority (Av),
and Manual exposure modes)
To use the flash, regardless of the lighting conditions.
Forced On with Red-Eye
Reduction
To use the flash, regardless of the lighting conditions.
Red-eye reduction minimizes the occurrence of red-
eye in pictures of people or animals by flashing twice.