


Chapter 5: Sharing Images 59 Connecting the Camera to Your Television
Note: To conserve battery power, you may want
to use an HP-approved AC power adapter to
power the camera while you have it connected
to a television.
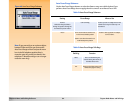
2 Connect the audio input (red) end of the audio/video cable into the television’s audio input
connector. This will allow you to hear sound that you recorded and attached to your images.
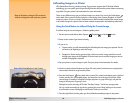
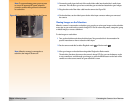
3 Plug the other end of the video cable into the camera (see Figure 36).
Figure 36: Connecting the Video Cable to the Camera 4 On the television, set the video input to be the video input connector where you connected
the camera.
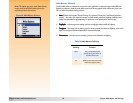
Viewing Images on the Television
When the camera is connected to a television, you can play or review your images on the television
screen just as you would on the camera’s image LCD. You can also mark, protect, categorize, group,
or delete images, or create a slideshow.
To view images on a television:
1 Turn on the television and select the video input. See your television’s documentation for
specific instructions on how to select the video input.
2 Set the camera mode dial to either Playback mode or Review mode .
Note: When the camera is connected to a
television, the image LCD turns off.
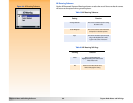
3 View your images on the television using either Playback or Review mode.
The television functions the same as the camera’s image LCD. You can use the buttons on the
4-way controller to scroll through your images, or press the MENU button on the back of the
camera to use the camera menus on your television’s screen.