


Chapter 3: Taking Pictures 23 Taking Simple Point-and-Shoot Pictures
Chapter 3: Taking Pictures
Overview
Once you have set your camera to Capture mode and you have a basic understanding of how to use
your camera’s status LCD and image LCD (see “Chapter 2: Preparing to Take Pictures” starting on
page 8), you are ready to take pictures. To optimize your camera’s capabilities, it is important to
understand how to use the zoom ring, what the indicators in the viewfinder LCD mean, what the
various LEDs mean when they light solid or blink, how to use Instant Review, and how to use the
sound recording features when taking pictures.
This chapter covers the following topics:
“Taking Simple Point-and-Shoot Pictures” on page 23
“Taking More Advanced Pictures” on page 24
“Using Focus Lock” on page 25
“Shooting a One Shot Image” on page 26
“Shooting Continuous Images” on page 27
“Shooting Timelapse Images” on page 28
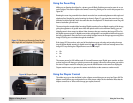
“Using the Zoom Ring” on page 29
“Using the Diopter Control” on page 29
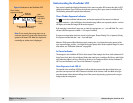
“Understanding the Viewfinder LCD” on page 30
“Understanding the LEDs on the Camera” on page 32
“Using Instant Review” on page 33
“Recording Sound” on page 34
Note: These instructions for taking simple
point-and-shoot pictures assume that your
camera is set to the default image type (One
Shot), and that Instant Review is on, as well.
(See “Setting the Image Type” on page 13 and
“Using Instant Review” on page 33 for more
information.)
Taking Simple Point-and-Shoot Pictures
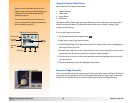
Here is the simplest method for taking pictures with your camera:
1 Set the camera mode dial to the Capture mode .
2 Power on the camera if you haven’t already.
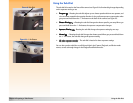
Note: When you remove the viewfinder cap,
you can place it inside one of the snapped
compartments on your camera’s neck strap
for safekeeping.
3 Remove the lens cap and the viewfinder cap.
4 Set the exposure mode dial to Auto .