


6 - 24
6-4 Adjustment Procedure
Start the adjustment program referring to “6-2-6 Starting and Terminating Adjustment Program”.
For the subsequent operation, operate the PC mouse while watching the PC monitor screen.
Information:
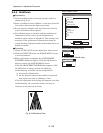
1) Display ×××× on subsequent PC screen shows the model name.
2) The numbers on PC screens show the operational procedure.
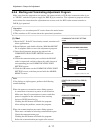
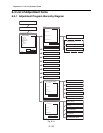
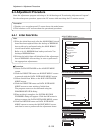
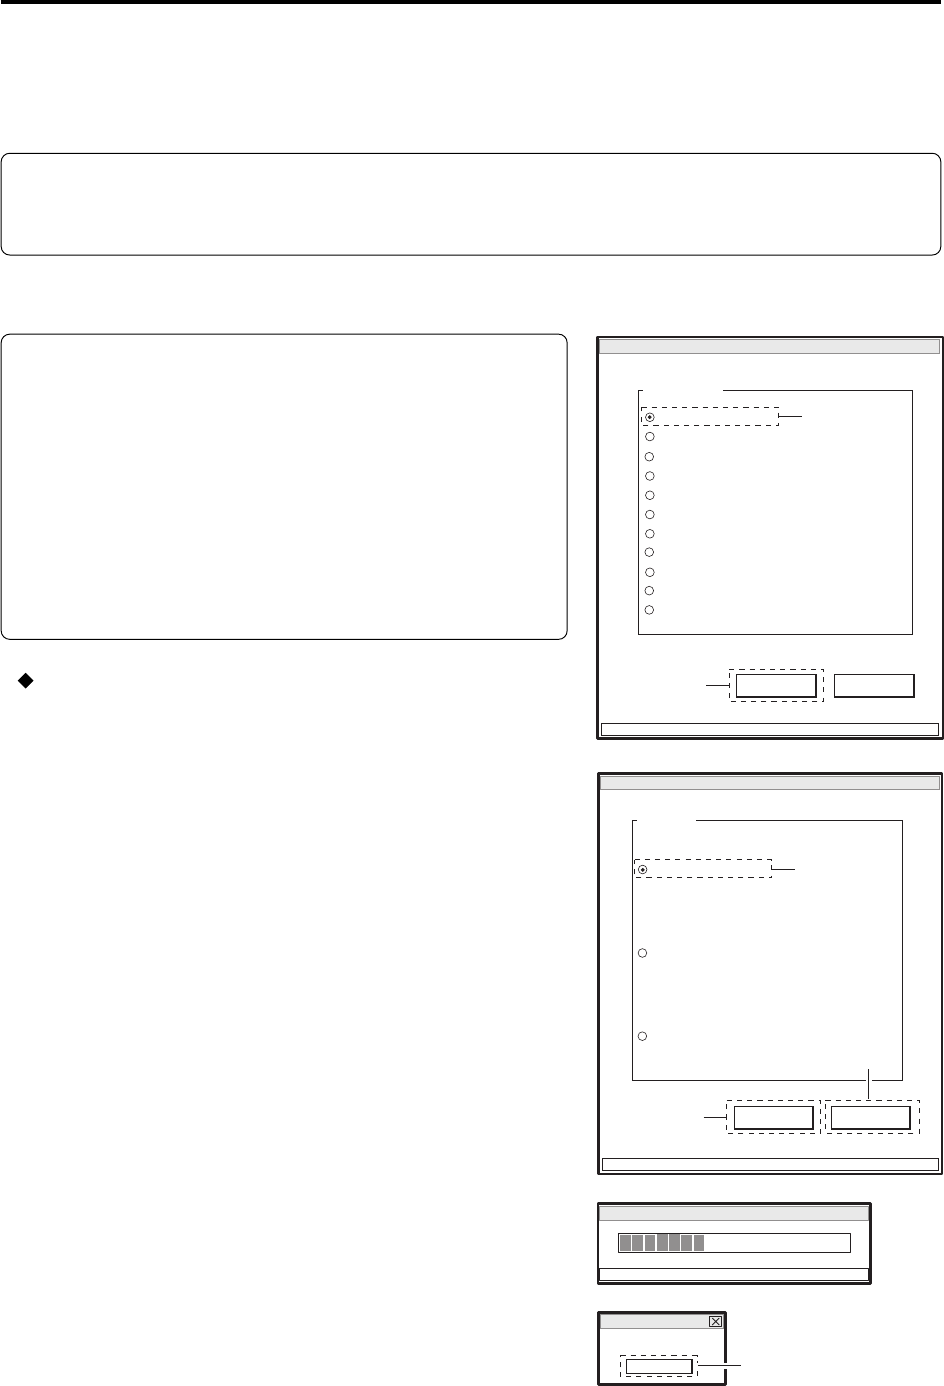
ADJUST MENU screen
Adjustment > Adjustment Procedure
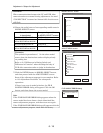
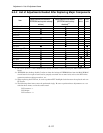
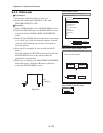
6-4-1 Initial Data Write
Note:
1) Write the initial data only after the MAN-H/MAN circuit
board has been replaced when the backup of EEPROM
data could not be performed using the MAN-H/MAN
circuit board before replacement.
Refer to “4-9-2 EEPROM data backup and write” for
backup of EEPROM data.
2) Writing the initial data will initialize all the adjustment
data in EEPROM. After writing, be sure to perform all
the appropriate adjustments.
Procedure:
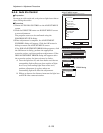
1) Choose DATA INITIALIZE on the ADJUST MENU
screen.
2) Click the EXECUTE button on ADJUST MENU screen
to proceed with the DATA INITIALIZE MENU screen.
3) Choose Initial Data Write on the DATA INITIALIZE
MENU screen.
4) Click the EXECUTE button on DATA INITIALIZE
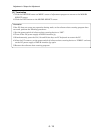
MENU screen to start writing of initial data.
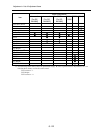
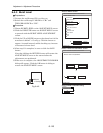
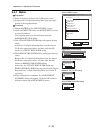
The progress status can be confirmed using the
PROGRESS STATUS dialog.
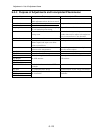
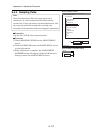
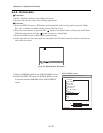
5) When writing is complete, the INITIALIZATION
FINISHED dialog will appear: Click the OK button in
dialog to restore the DATA INITIALIZE MENU screen.
6) Click the RETURN button on DATA INITIALIZE
MENU screen to restore the ADJUST MENU screen,
and then be sure to perform all the adjustment items.
DATA INITIALIZE MENU screen
PROGRESS STATUS dialog
INITIALIZATION FINISHED dialog
MANUAL ADJUSTMENT PROGRAM for SERVICE STATION
MODEL NAME:
××××
DATA INITIALIZE
EXECUTE
RETURN
CONNECTION
ADJUST MENU
SAMPLING PULSE
AUTO IRIS CONTROL
MATRIX
CHROMA GAIN
AUTO FUCUS
SPOT NOISE
LCD
EVF
VIDEO LEVEL
BURST LEVEL
2
1
Data Initialize
Initial Data Write
EXECUTE
RETURN
CONNECTION
FILE MENU
Original Data Backup
Backup Data Write
4
3
6
DATA INITIALIZE
PLEASE WAIT A MOMENT
FINISHED
FINISHED WRITING DATA
OK
5