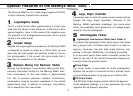
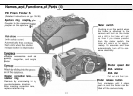
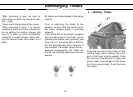
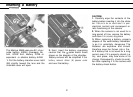
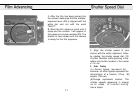
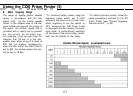
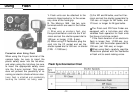
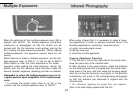
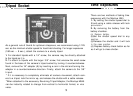
0 Exposure Compensation
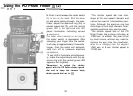
The LED Panel incorporated into the PD
Prism Finder simplifies exposure com-
pensation, assuring perfect exposures
everytime. Each LED represents a
full stop increment and plus and minus
signs are indicated within the view-
finder to assist in compensating.
The uppermost LED represents three
or more stops overexposure, and the
lowermost LED represents three or
more stops underexposure.
e Compensation Hints
1. For strongly back-lit subjects out-
doors, set the exposure to + 1 (the red
LED directly above the green one).
2. To photograph a person indoors,
seated next to a window and strongly
back-lit, set exposure to + 2.
3. When photographing interiors, to
compensate
for the
bright interior lights,
set exposure to +1 or + 2.
4. When copying white documents, set
exposure to +2. If a standard gray
card is used to determine exposure,
no correction is necessary.
5. When photographing a brightly lit
subject against a dark background,
such as a night club performer, set
exposure to
-
1 or
-
2.
6. Brightly lit night scenes, such as city
streets, are usually rendered most
naturally with the correct exposure
(green LED).
7. When photographing extremely dark
subjects (e.g. close-up of a black cat),
set exposure to
-
1.
*
The exposure compensation or LED
panel can also be used to increase the
ASA
range to 3
-
51200. For example,
with the
ASA
dial set to 25, instead of
using the green LED for correct ex-
posure, use the +3 LED when using
ASA 3 film.
*
Since the upper and lowermost
LED’s represent 3 or more stops differ-
ence from the central (green) LED,
whenever compensating by 3 stops,
first adjust the aperture or shutter
speed for 2 stops of compensation and
then move the aperture ring or shutter
speed dial one more click stop for 3
stops of compensation.
38
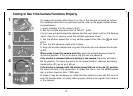
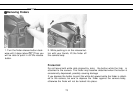
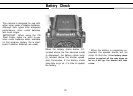
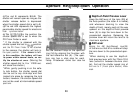
Correct Exposure Measurement
*The TTL metering system of your
PD Prism Finder makes it unnecessary
to consider such factors as the differ-
ence in angle of view of interchange-
able lenses, filter factors, or exposure
increase for macrophotography. (For
accurate exposure measurement when
taking close-ups, be sure to carefully
read the instructions packed with the
auto bellows, reverse ring, etc.)
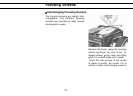
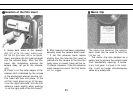
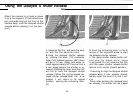
*In macrophotography, the amount of
light reaching the film varies in ac-
cordance with the extension of the
auto bellows, extension rings, etc.
Consequently, for accurate results be
sure to first focus on the subject before
taking an exposure measurement,
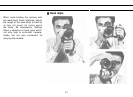
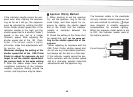
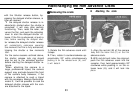
*To prevent extraneous light from en-
tering the eyepiece and influencing the
exposure reading, keep your eye close
to the eyecup when making an expo-
sure measurement.