Operating Instructions
[For assistance : 1-800-272-7033] 27
4.
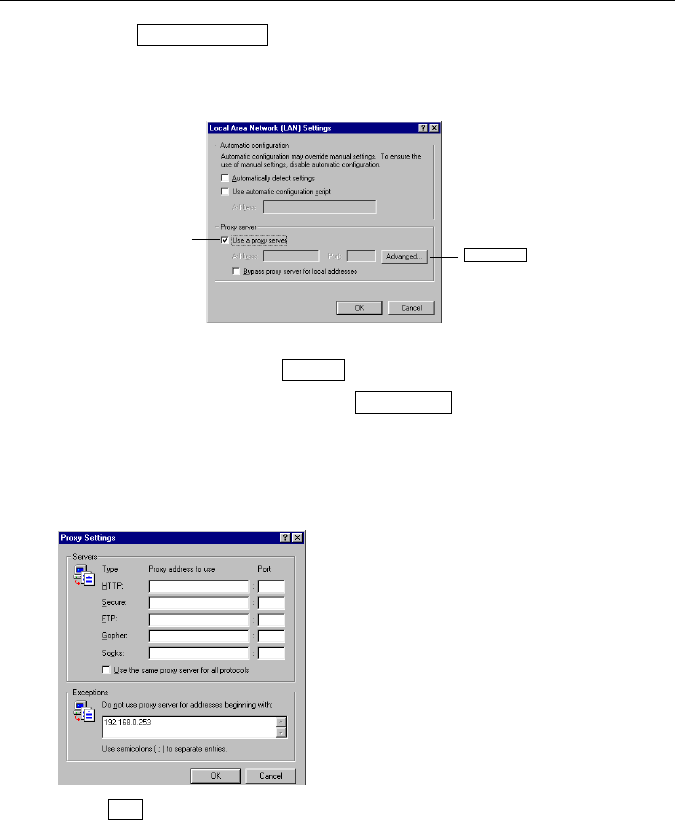
Click the button. The Local Area Network [LAN] settings
dialogue box appears.
5.
In this box, confirm if the Use a proxy server check box is checked or not.
If the check box is not checked, web browser setting for a proxy server is
not necessary and click button and skip the following procedures.
If the check box is checked, click button and the Proxy
Settings dialogue box appears.
6.
Enter "192.168.0.253" (or your acquired IP address of Network Camera from
network administrator) into the Do not use proxy server for addresses
beginning with data field.
7.
Click . And setting is completed.
1.5.3 Confirmation of the Network setup
The Network Camera has a built-in web server function. If you can access Top
Page of the Network Camera, the setup of the computer and the Network Camera
has been successfully made.
Follow the steps below and confirm the setup.
LAN Settings...
Confirm if the check
box is checked or not.
When checked, click
Advance... button.
Cancel
Advanced...
OK
