USING THE MENU SCREEN AI/BLC•MULTI
BLC/MULTI (multi-spot photometry) mode setting (DC type lens only)
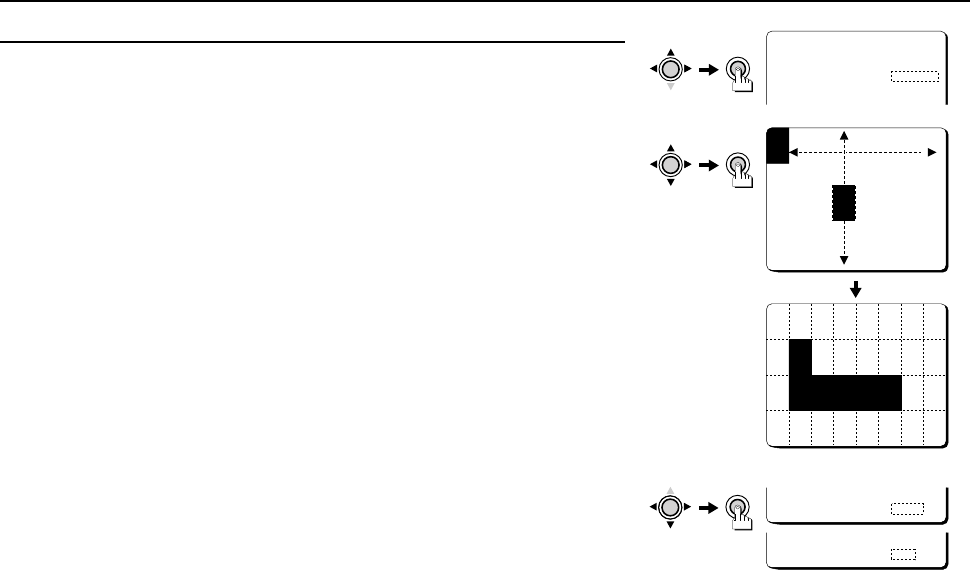
1 Press the CURSOR (j, then d or c) button so that “MULTI” is selected for BLC (the
setting will flash), then press the SET button.
The BLC MASKING screen will be displayed. The mask cursor will also be flashing in the
top-left corner of the screen.
2 Press the CURSOR (d, c, j or l) button to move the mask cursor to the place
where photometry is not to be carried out, then press the SET button.
Continue pressing the CURSOR and SET buttons to apply masks to other areas. Masks can
be applied to a maximum of 32 separate sections (4 x 8).
Note:
• If you apply a mask to a wrong area by mistake, press the SET button once more to clear
the mask.
• When doing the MULTI setting, the dotted lines shown on the illustration are for clarity
only, they do not actually appear on-screen.
3 When all masks have been applied, press the CURSOR (l) button to move the mask
cursor to the bottom edge of the screen, and continue pressing the CURSOR button
for about 3 seconds.
☞ Returning to the default setting
Press the CURSOR (l, then d or c) button to change the PRESET setting to ON, then
press the SET button.
4 When finished:
Press the CURSOR (l) button to select BACK (it will flash) at the bottom of the screen.
Then press the CURSOR (d or c) button to change BACK to END, and press the SET
button.
☞ To return to the previous screen, select BACK then press the SET button.
ADJUSTMENT FOR AI
LENS TYPE DC
BLC MULTIp
SENSE UP OFF
SET
CURSOR
CURSOR
SET
MENU BACK
CURSOR
SET
MENU END
BLC MASKING
CONT PRESS(2)
(Example)
L53R4/US GB 1999, 12, 7
24 English
