104
Audio dubbing
Adding audio to a recorded tape
Choose a connection mentioned on pages 102 to 103, and connect audio equipment or
microphone to your camcorder. Then follow the procedure below.
The POWER switch should be set to .
Operate by touching the panel.
(1) Insert the recorded tape into your camcorder.
(2) Locate the recording start point. Press
to start playing back. To pause
playback, press
at the recording start point.
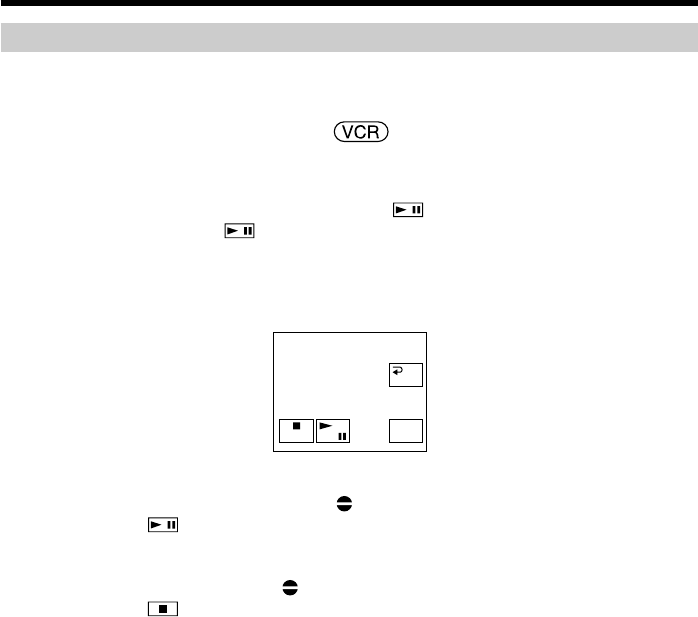
(3) Press FN and select PAGE3.
(4) Press A DUB CTRL.
The A DUB CTRL screen appears.
(5) Press AUDIO DUB. The green
X indicator appears on the screen.
(6) Press
on your camcorder and at the same time start playing back the
audio you want to record.
The new sound is recorded in stereo 2 (ST2) during playback. While recording
the new sound, the red
indicator appears on the screen.
(7) Press
on your camcorder at the point where you want to stop recording.
To add new sound to previously recorded sections more precisely
During playback, press ZERO SET MEMORY on the Remote Commander at the point
where you want to stop recording new sound.
Follow steps 2 to 7. Recording automatically stops at the point where ZERO SET
MEMORY was pressed.
We recommend that you usually add new sound on a tape recorded only with
your camcorder
If you add new sound on the tape recorded with another camcorder (including another
DCR-PC105), the sound quality may deteriorate.
REC
PAUSE
RET.
REC
PAUSE
RET.
REC
PAUSE
RET.
REC
PAUSE
RET.
REC
PAUSE
RET.
REC
PAUSE
RET.
REC
PAUSE
RET.
A DUB CTRL
RET.
REC
START
REC
START
REC
START
REC
START
REC
START
REC
START
REC
START
AUDIO
DUB


