


92
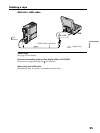
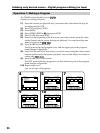
When the VCR does not operate correctly
•After checking the code in “About the IR SETUP code” (p. 91), set the IR SETUP or the
PAUSEMODE again.
•Place your camcorder at least 30 cm (12 in.) away from the VCR.
•Refer to the operating instructions of your VCR.
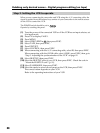
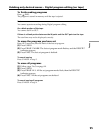
Step 3: Adjusting the synchronization of the VCR
You can adjust the synchronization of your camcorder and the VCR.
Prepare a pen and paper for notes.
Before operation, eject the cassette from your camcorder (if inserted).
The POWER switch should be set to .
Operate by touching the panel.
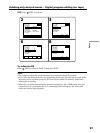
(1) Insert a recordable cassette into the VCR, then set the VCR to record pause.
When you select i.LINK in CONTROL, you do not need to set the VCR to
record pause.
(2) Select ADJ TEST, then press EXEC.
(3) Select EXECUTE, then press EXEC.
IN and OUT are recorded on an image for 5 times each to calculate the
numerical values for adjusting the synchronization.
The EXECUTING indicator flashes on the screen. When finished, the
indicator changes to COMPLETE.
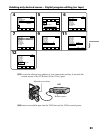
(4) Rewind the tape in the VCR, then start slow playback.
5 IN numbers and corresponding OUT numbers are displayed.
Take a note of the opening numerical value of each IN and the closing
numerical value of each OUT.
(5) Calculate the average of 5 opening numerical values of 5 IN, and the average
of 5 closing numerical values of each OUT.
(6) Select ”CUT-IN,” then press EXEC.
(7) Select the average numerical value of IN, then press EXEC.
The calculated start position for recording is set.
(8) Select ”CUT-OUT,” then press EXEC.
(9) Select the average numerical value of OUT, then press EXEC.
The calculated stop position for recording is set.
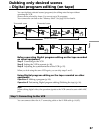
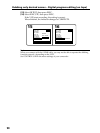
Dubbing only desired scenes – Digital program editing (on tape)