


36CV501 - 16CH
NETWORK SETUP...continued
5. After you have entered all the information select the
button to save changes and exit the menu. The DVR may take a few moments
to load.
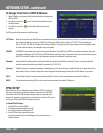
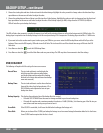
If you receive an email from the DVR it will include:
• The event subject you picked in the subject line of the email
• Warning Message: The date and time that the event took place
• NIC: The IP address of the DVR
• Player: The option to download the player software from the DVR
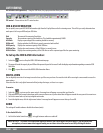
FTP SETUP
You can enable the DVR to work with an FTP server so that motion or alarm triggered events will be automatically uploaded onto the server. To
congure the DVR to upload onto an FTP site you will need to have access to an FTP server (not provided by SVAT). Video clips will be uploaded in
.264 le format and will require the playback software to view the video clips.
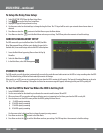
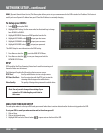
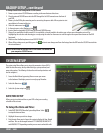
To enable the DVR to send video clips to your FTP server when motion or alarm is detected:
1. Click on Menu.
2. Click on the Network setup.
3. Highlight FTP and select the button .
4. Highlight and enable Motion and/or Alarm settings by using the scroll
wheel on your mouse or the up and down arrow keys on the front panel
of the DVR.
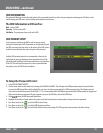
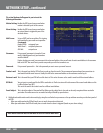
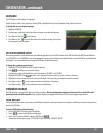
When you click to set the following items the digital keyboard will pop
up for you to insert the following info:
5. FTP Server: The host name of your FTP server. This could be a full
hostname like ftp.svat.com or in IP address form,
216.12.36.244.
6. Username: The username you use to access the FTP server.
Most FTP usernames are case sensitive. Use the
Shift button to change the case of characters when
inputting the username.
7. Password: The password you use to access the FTP server. Most FTP passwords are case sensitive. Use the Shift button to change the
case of characters when inputting the password.
8. Port: The port being used by the FTP server. By default this is port 21 and is the commonly used port for FTP service.
9. Path: The path where you want the les to be placed on your FTP server. If you would like to change the le folder that the DVR
will upload the les to, enter the desired path name. The DVR will create a folder for each day that les are uploaded in the
following format: YYYYMMDD.
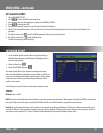
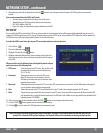
10. After you have input all the information select the ENTER
button to save changes and exit the menu.
11. Press the ENTER
button again to save the overall network settings.
12. Click the
to exit the menu. The DVR make take a few moments to load.
Note: Files need to be played back using the playback software. The player can be downloaded from the web interface, the
included CD, or from the DVR’s product webpage. See Playback Software for information on how to play back up les.