


40CV501 - 16CH
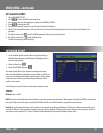
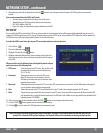
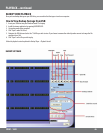
System Type
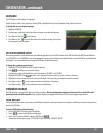
The two system types that are available on this DVR are PAL and NTSC. The North American standard is NTSC and should only be set to PAL if the TV
or monitor that the DVR is connected to uses only PAL format.
To set the system type:
1. Highlight SYSTEM TYPE from the System Setup Menu. Use the mouse wheel or directional keys to change from NTSC to PAL.
2. Select the
to exit the SYSTEM TYPE menu.
3. Select the
to exit the Main Menu and save your settings. The DVR may take a few moments to load the settings.
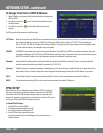
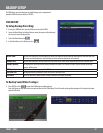
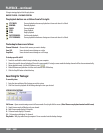
Keyboard Lock
The keyboard lock option will prevent people from using the buttons on the front of your DVR without a password. This does not lock out the Menu.
Enable system password to protect the Menu from unauthorized change. There are two dierent Keyboard Lock options:
Type 1 – Allows a user to change monitor views, but requires a password to search and control playback.
Type 2 – Prevents unauthorized user from performing any action without a password. (System password prevents a user from accessing the Menu).
To set the keyboard lock:
1. Highlight KEYBOARD LOCK.
2. Use the mouse wheel or directional keys to choose between Type 1, Type 2 or OFF.
3. Select the
to save and or press ENTER.
4. Exit the Main Menu
to save these settings. It may take a few moments to save the changes.
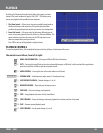
DVR ID Number
Used to identify this DVR if using multiple DVRs. The ID value can be set from 0 – 31.
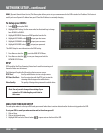
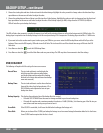
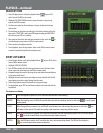
DISPLAY SETUP
Allows you to congure the on screen display of the DVR to show camera titles, the DVR’s status, and the date and time in live display mode.
To set the display parameters:
1. Highlight DISPLAY SETUP from the System Setup Menu.
2. Select to setup the date and time.
3. Use the mouse wheel or directional keys to enable CAMERA TITLE, DVR STATUS and DATE/TIME. By enabling these options, the camera title, the
status of the DVR and the date/time will appear on the viewing screen.
4. Select the
to save.
5. Exit the Main Menu.
It may take a few moments to save the changes.
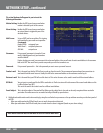
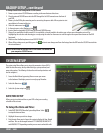
4. NTP (Network Time Protocol) Mode can be enabled or disabled to allow the DVR to synchronize the date and time with a NTP server. By default
the NTP server IP is set to 198.123.30.132.
5. Choose your GMT Time zone. Example: Central Time Zone = -06:00 GMT.
6. Update Time will be how often the DVR checks with the NTP server to update the system time with the current NTP server time. It can be set
from every 1 hour up to every 24 hours.
7. Press Menu or select the
to exit the Date/Time Setup Menu.
8. Press Menu or select the
to exit the Main Menu and save your settings. The DVR may take a few moments to load the settings.
SYSTEM SETUP...continued