


46 Printing Special Photos
Caution: Don’t open Epson Status Monitor, pause printing, or respond to any ink
messages when your printer is printing. This may cause the printer to pause and
leave an uneven surface on your printout. If your ink is running low, wait until
printing finishes before checking ink levels or attempting to replace a cartridge. If
you must replace an ink cartridge in the middle of a print job, the quality of your
printout may decline. For best results, check your ink levels and replace ink
cartridges, if necessary, before printing large or high-resolution print jobs.
Follow the steps for your operating system in these sections to print BorderFree
photos on cut sheet paper.
■ “Windows” below
■ “Mac OS X” on page 47
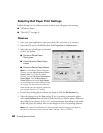
Windows
1. Start your printing application and
open your photo file.
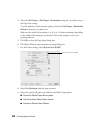
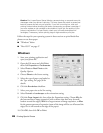
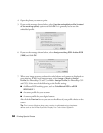
2. Open the File menu and click Print,
then click Properties or Preferences.
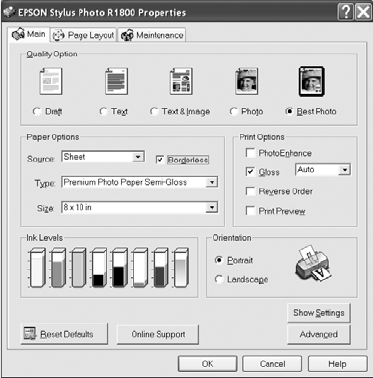
3. Select Photo or Best Photo as the
Quality Option.
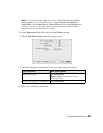
4. Choose Sheet as the Source setting.
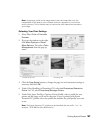
5. Select the type of paper you loaded as
the Type setting. See page 38 for
details.
6. Click the Borderless checkbox.
7. Select your paper size as the Size setting.
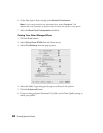
8. Select
Portrait or Landscape as the orientation setting.
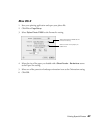
9. Click the Page Layout tab, then adjust the Expansion setting. Choose Min for
the least amount of image expansion (with a chance that there may be small
borders around the edges),
Mid for a larger amount of image expansion, or Max
for the greatest amount of expansion (some of the image will be cut off around the
edges, but it will extend to the edge of the paper).
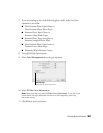
10. Click
OK, then click OK or Print.