


Maintaining Your Printer 81
Manually Aligning the Print Head
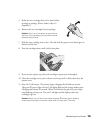
1. Turn on the printer.
2. Load letter-size Epson Presentation Paper Matte.
3. Do one of the following:
Windows: Right-click the icon on your taskbar (in the lower right corner of
your screen). Select Print Head Alignment.
Note: If the icon does not appear, click Start > Printer (and Faxes), right-click on
EPSON Stylus Photo R1800, and select Printing Preferences. Select the
Maintenance tab and click Print Head Alignment.
Mac OS X: Open the Applications folder and select EPSON Printer Utility.
Select SP R1800, click OK, and select Print Head Alignment.
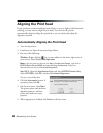
4. Click the Manual button, then click OK.
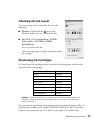
You see a screen like this as the printer
prints an alignment check pattern:
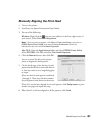
5. On the check page, select the box in each
pattern that has the least noticeable lines in
it. You may need to use a magnifying glass
or loupe.
Select one box for each pattern numbered
1 through 3. Then enter the box number
for each pattern in the boxes on the screen.
If box #5 is not the best-aligned box in each pattern, click Realignment to print
another test page and repeat this step.
6. When box #5 is the best-aligned in all the patterns, click
Finish.