


Chapter 5 Various Ways to Scan
Appendix
Glossary
Introduction
Index
Contents
TOP
72
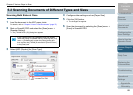
How to Load
Documents
Daily Care
Troubleshooting
Operational
Settings
Replacing the
Consumables
Scanner
Overview
Various Ways to
Scan
Configuring the
Scan Settings
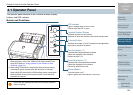
How to Use the
Operator Panel
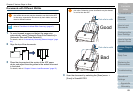
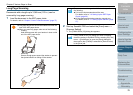
z There may be a line or a gap appearing between the
front and back side images.
Also when you scan thick papers, images on both left
and right may skew towards each other from the top.
These symptoms may be improved when you perform
the following:
- Fold the document tightly
- Align the edges of the document neatly with the
edges of the Carrier Sheet
- Turn over the Carrier Sheet to the other (reverse)
side
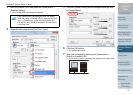
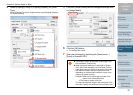
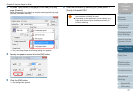
z When [Automatic detection] is specified for [Paper
Size], the closest standard size (A3, A4 or Double
Letter) is selected from the same drop-down list. Note
that the size of the image may become smaller than the
original document depending on the document
scanned.
Example: When you scan an A3 size document whose
content is printed to fit A4 size in the center
DThe image is output in B4 size.
To output the scanned image in the actual size of the
document, specify the document size for [Paper size].
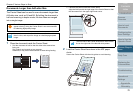
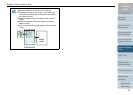
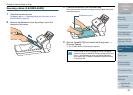
z Part of the image around where the document is folded
may appear missing. In that case, set the document so
its edge is about 1 mm inside from the edge of the
Carrier Sheet.
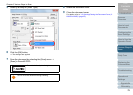
z When [Black & White] is specified for [Image Mode],
the edges around the image may appear in black from
the shadow of the document.