


101
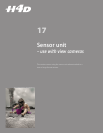
H4D
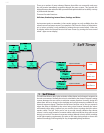
Menu charts – general
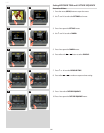
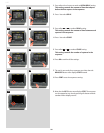
Throughout this manual you will nd charts to explain the
steps and procedures required to alter the various settings.
These charts are laid out to graphically illustrate in a simple
manner how to navigate through the menus. While they
include all the information that would be presented on the
display relevant to that section, they cannot illustrate all
the possible combinations of the various symbols seen on
a screen at one time as that would be impractical and too
confusing. If you are familiar with mobile/cell phone menus,
for example, then the design of the layout and working
practice will not be unfamiliar.
You should nd that, in practice, working your way through
a menu on the camera is a good deal simpler and more
obvious than the written explanation implies!
In the descriptions, various terms are used regarding menu
navigation. Menus have ‘trees’, for example, which describes
their imaginary graphical layout where you could trace a
navigational path along its ‘branches’. Each new section, or
stopping o point on the branches, seen on the display is
called a ‘screen’. Therefore a screen is the graphical display
of where you are on the menu and represents the current
state of settings.
The H4D features the advantage of multiple customization
of settings. This means that your personal choice of settings,
and thereby appearance of various combinations of symbols
on the display at any time, will not necessarily be the same
as many of the screens illustrated in this manual.
To simplify the descriptions, reference is often made to a
‘main’ or standard screen. Apart from default settings, there
is no actual standard setting in the normal sense and there-
fore you create your own ‘standard’, which of course can be
changed at any time.
The ‘main’ screen is therefore the one you have currently
created and is the one visible on the display when photo-
graphing (except where a particular mode is in actual
operation, such as self-timer, for example).
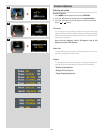
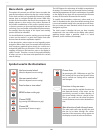
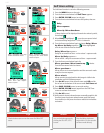
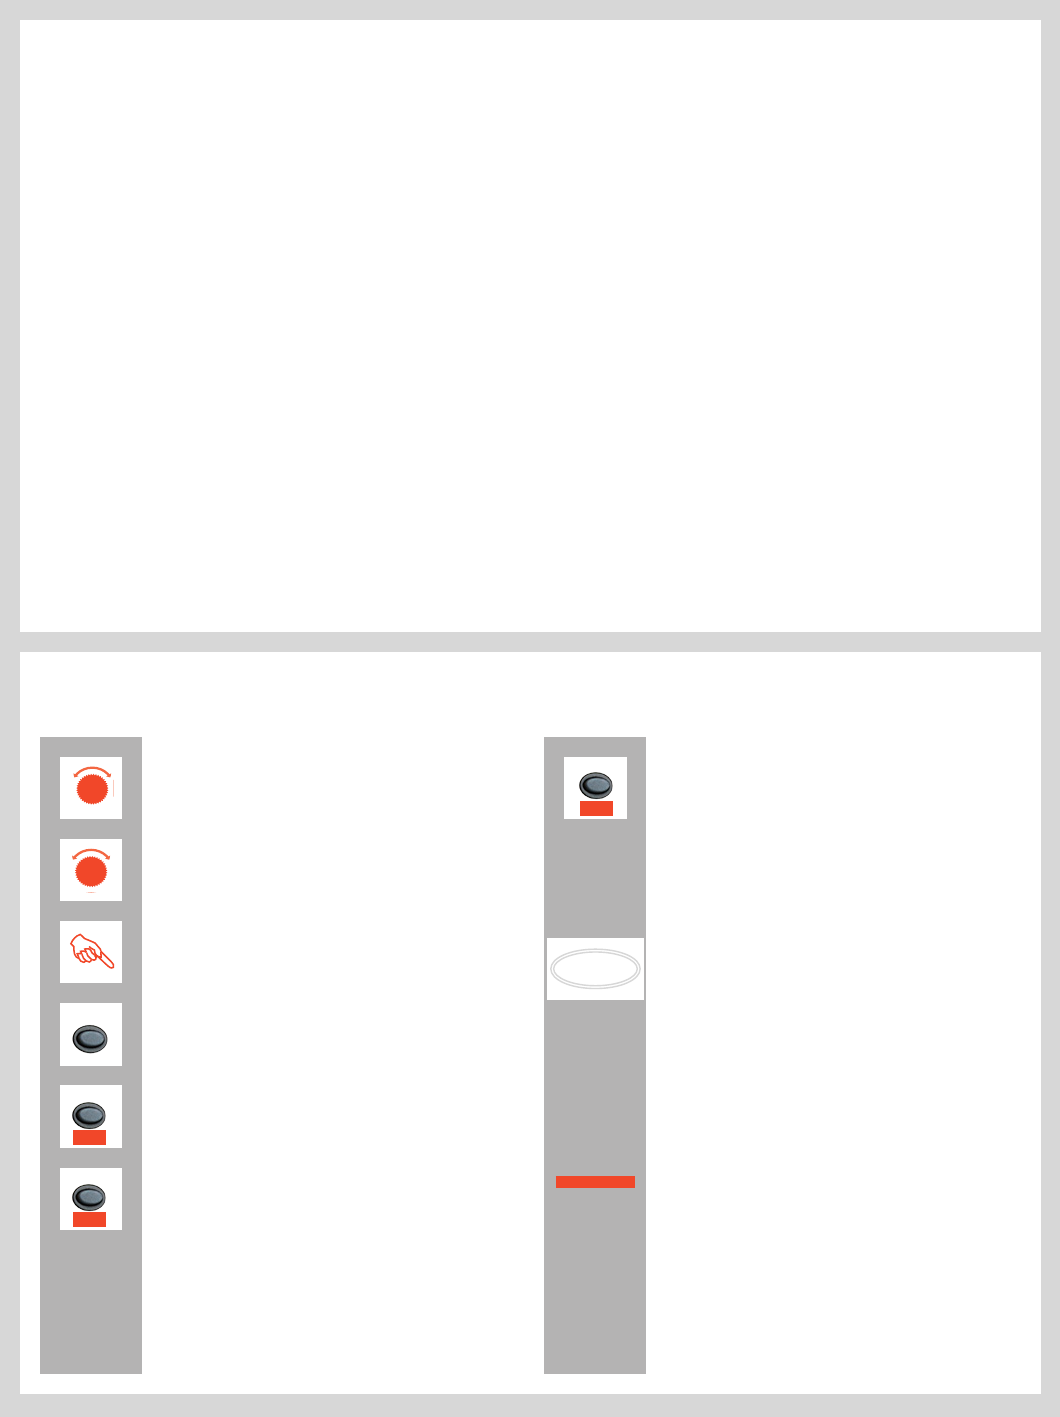
Symbols used in the illustrations
Choose Save
(by pressing the ISO / WB button on grip) The
new setting will be saved and chosen action
can be carried out. Setting will be retained
until changed.
Use front control wheel
(direction depends on user setting)
Use rear control wheel
(direction depends on user setting)
Press button or turn wheel
MENU button on the grip
Choose ENTER
(by pressing ISO/WB button on grip)
Choose ON
(by pressing AF button on grip)
MENU
F
R
ISO/WB
Enter
AF
On
ISO/WB
Save
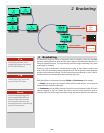
Functions in loop on menu
A loop means that the available functions on
that particular branch of the menu can be
successively accessed in either direction of
the control wheels without a break in ow.
That is, you could turn the wheel clockwise
or anti-clockwise to arrive at the desired func-
tion.
Main direction of path through menu
The main path traces step-by-step the path
that has to be taken through the various
branches of the menu tree as they appear on
the display to reach the relevant functions.