


26
H4D
11
Rechargeable battery grip – precautions:
The following precautions should be followed:
• Connectthebatterygriptothecameracorrectly.
• Keeptheprotectivecoverinplacewhennotinuse.(Short-circuitingacrosskeysinapocket,forexample,could
causearerisk).
• DonotusethebatterygripforanythingotherthanH1/H1D/H2/H2D/H3D/H4Dcameras.
• Donotimmersethebatterygripinliquids.
• Donotincineratethebatterygrip.Pleaserecycleordiscardinanenvironmentallyapprovedmanner.
• DonotuseanyotherchargerthantheHasselbladbatterychargerBC-HLi-ion7.2VDC(3053568).
Battery charger BC-H Li-ion 7.2 VDC – precautions:
• Readtheinstructionsbeforeusingthecharger.
• Useindoorsonly(protectagainstmoisture).
• DonotusechargerforanythingelsethanchargingofBatterygriprechargeable7.2V(3043348).
• Donotshort-circuitthejackplug.
• Donotalterthechargerinanywayotherthanchangingtheplugattachment.
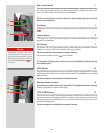
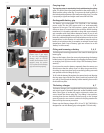
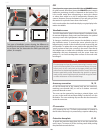
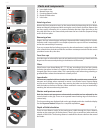
Reservelithium-batterygrip 9,10
The reserve lithium-battery grip (accessory) is attached and removed in the same
manner as the rechargeable grip.
Press the red battery cassette retaining button inwards on the holder to release the
battery cassette (g 9). Load three CR-123 lithium (or equivalent) into the cassette, ensur-
ing the polarity of each battery is correctly oriented (see the ‘+’ markings on the batteries
and the cassette) (g 10, 11). Re-insert the cassette into the battery holder, ensuring that
it is seated properly in place and that the red button returns fully into the locked posi-
tion. Holding the battery at against the camera body and aligning the two upper lugs
with the slot, slide it back into position as far as it will go. Swing back the battery holder
retaining lever as far as it will go into the locked position.
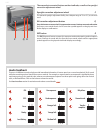
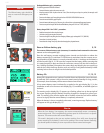
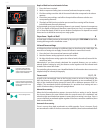
Battery life 11, 12, 13
Battery life is dependent on a number of variable factors and therefore cannot be exact-
ly predicted. If the camera is left in the active state instead of standby for long periods,
for example, then the battery will become exhausted much faster.
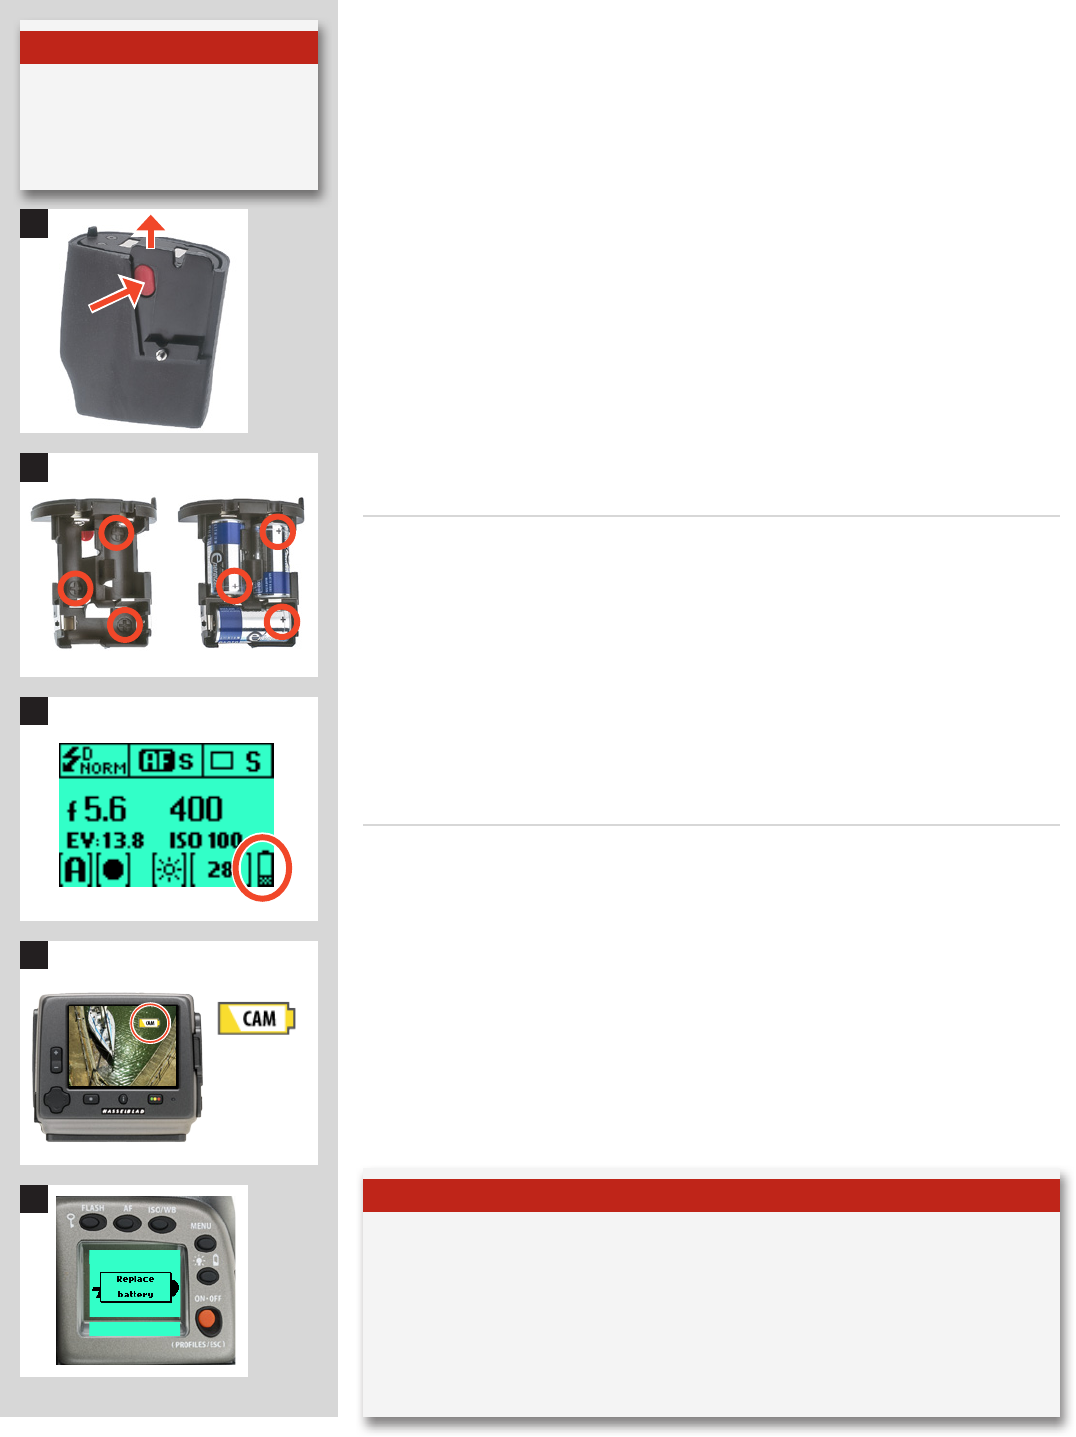
A low camera battery state is indicated by a symbol on the grip display (g. 11), in the
viewnder as well as on the sensor unit display (g. 12). In addition, an audible signal can
be heard.
The warning on the display (g. 12) appears as a ashing yellow icon in the top right of
the screen signifying that the battery should be charged (or changed) as soon as pos-
sible. The warning icon will also appear with a FireWire connection and will in addition
turn red to signify that the camera battery is completely exhausted.
When the battery is almost completely exhausted, a warning message ‘Replace battery’
will appear on the grip display (g. 13).
9
10
12
Camera bat-
tery warning
13
Note
The lithium-battery grip should be
seen as a reserve for emergency use
only.
Note
When the ‘Low battery’ icon appears, the camera automatically enters a temporary
power-saving mode. This is recognizable by a slower pace for all the actions in a capture
sequence. The camera actions also sound dierently.
This mode is designed so that you can continue working for a while, even though the
power remaining in the battery is too low for working in the normal manner. Naturally,
you should replace the battery as soon as possible to restore normal action again.