


33
H4D
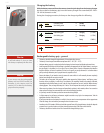
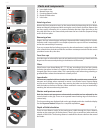
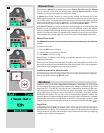
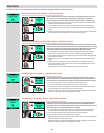
Depth-of-eld can be calculated as follows:
1. Focus the lens as required.
2. Make an exposure reading (auto or manual) and note the aperture setting.
3. Find the markings on either side of the central index that correspond to the chosen
aperture.
4. From these two markings, read o on the required lens distance scale the two
corresponding distances.
5. The depth-of-eld (at that particular aperture and focus setting) will be the area
included between these two distances.
In the example given here, the focusing distance is set at nearly 3 metres. At an aperture
of f/22, the depth-of-eld would therefore extend from just over 2 m to approximately
4.5 m. Note that depth of eld is not an absolute. Perception of it depends on several
factors and so it should be seen only as a rough guide.
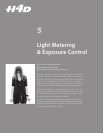
Stopdown/depth-of-eld 8
A visual depth-of-eld preview can be made by depressing the
STOP DOWN
button while
viewing the image on the viewnder screen.
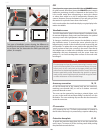
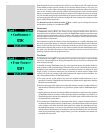
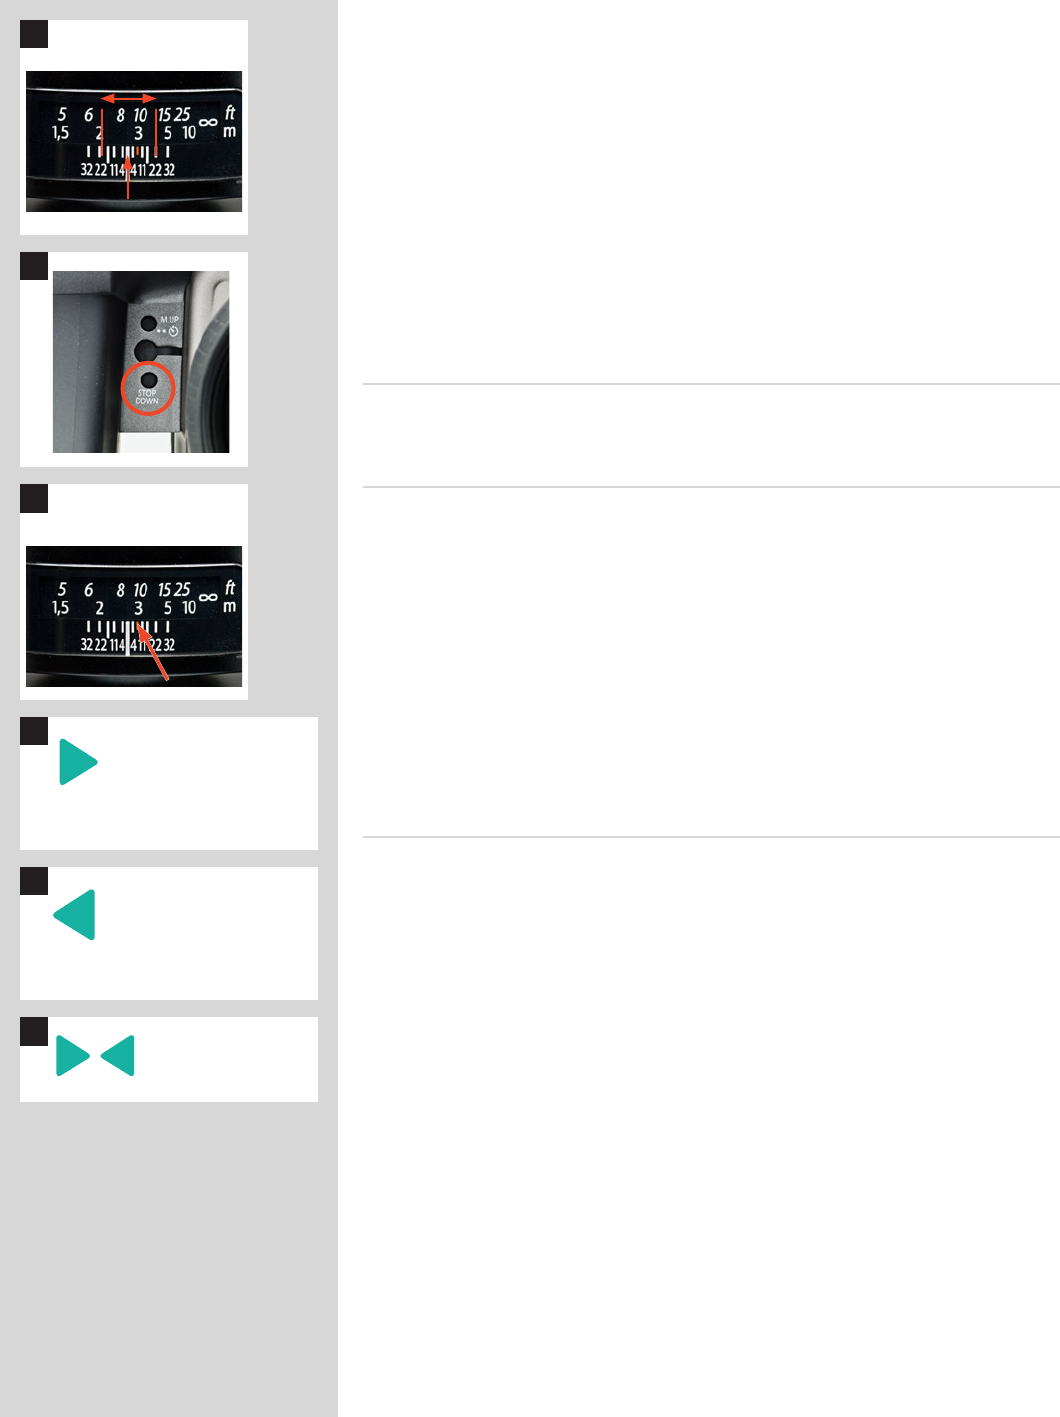
Infraredfocussettings 9
As infrared rays form an image at a dierent plane to that formed by visible light, the
normal focus settings do not apply. Proceed as follows in manual focus mode:
1. Focus the lens in the conventional manner until satised.
2. Note the distance setting against the central lens index.
3. Re-align this distance setting against the infrared mark (coloured red) instead of the
central lens index.
Alternatively if you have already calculated the required distance, you can make a
manual distance setting by using the distance scales together with the infrared mark
instead of the central lens index.
For specialists, please contact your Hasselblad dealer for information about sensor units
adapted solely for infrared photography.
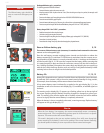
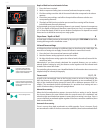
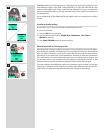
Focus assist 10, 11, 12
As well as the conventional view on the focusing screen to ensure a sharp image, the
H4D also features an LED focus assist capability appearing as two arrowheads to the
right of the viewnder display (except for lenses with a maximum aperture of f/6.7 or
smaller). The arrowheads provide conrmation of a precision focus setting and are a
useful aid when making a setting with eyesight alone.
Manual focus setting
When the left arrowhead alone appears it means the focus setting is too far beyond
the chosen distance (the area framed within the central zone in the viewnder) and
when the right arrowhead alone appears it means the focus setting is too close. Focus is
correct when both arrowheads appear together. If the focus cannot be established, then
both arrowheads ash.
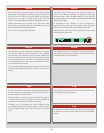
Automatic focus setting
Focus is correct when both arrowheads are visible together. Focus is incorrect if only
one arrowhead is visible. If the focus cannot be established, then both arrowheads ash.
7
8
9
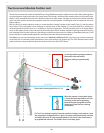
Lens focus setting too far
beyond the distance of the
subject framed by the central
section in the viewnder
10
Focus setting too close for the
distance of the subject framed
by the central section in the
viewnder
11
Focus setting correct
12